Sunday, November 30, 2014

The Results of the Being Thankful Second Annual Giveaway!

I double checked the tallies, and we have two new winners of the Second Annual Being Thankful Giveaway! First, I want to thank every single person who stopped by to read the blog, follow me on twitter, and join our group on Facebook. I couldn't be the teacher I am without your comforting and supportive comments. :) Second, there was an overwhelming response for the batt/magazine part of the giveaway, so hang tight for a few days while I think of what to do for those who didn't win anything...there were a lot of you who wanted that batt! I had hoped for a slightly more even split for the handspun and batt, but it would appear that most of you are spinners (or soon to be!). Last, let's bring on the results.

As I mentioned before, I was going to use a random number generator (random.org) to generate the winners. For the Handspun, we have:


...Barbara-anne Nash! You are the lucky winner of the handspun. :) I really hope you like it and enjoy crafting with it.

Now, for the batt/magazine:


...the lucky winner is Amy Connolly! I hope you enjoy the batt and the extra copy of Spin-Off magazine.

Winners, please send me your mailing address: expertlydyed@zoho.com. I will get these items shipped off to you as soon as I can! Again, thank you to everyone who participated in this giveaway. And if anyone was curious, here are the results of the cranberry/gravy question:


It was practically an even split! And, as always, I will kick off December with a new coupon: FLASHSALE15 for 15% off a purchase worth $10 or more from my Etsy shop. I'm letting you in on the sale a week early! Enjoy the discount and first pick of my items before I open up the sale to the Etsy community. Thank you all for making this year great! <3

Tuesday, November 25, 2014

Being Thankful: Fiber Arts Giveaway!

Have I thanked you today? Here's my big 'thank you' to all of you. Why? Though I don't say it, I appreciate you all for being with me every day. Especially right now. It's tough being creative when there aren't many people to share your creativity with, and when I share things on Facebook, Twitter, Instagram, or YouTube, I really feel like I'm part of a community. I hope you do too. Now, I'm not one to be overly girly, emotional, or touchy-feely, but you all give me the warm fuzzies all the time. :) As I've said in the past, it's all of you that keep me inspired to keep doing what I'm doing. Sure, I've had difficult times with Expertly Dyed, but it's always you and your enthusiasm which motivate to be a better teacher, creator, communicator, and business owner.

One of the fabulous aspects of being a small business owner is that we can affect change. Ten years ago, commercial stores were just starting to pick up on handknits as 'the next hot item.' Five years later, fabulous styles and yarns were being incorporated into commercial handknits. Now, wool is coming back into style. And who got it there? Small businesses like us, who care about our product, the quality of our product, and the impact it might have on our environment. I'm especially enthusiastic about this trend since wool-based products removes more petroleum based products from our households, uses a great renewable resource for clothing and padding, and prevents sheep herders from having to burn wool since no one wants it. Baby steps, but we're making national, and perhaps global, changes.

Now, without further adieu, let's show off the giveaway:


This batt is 113g and light as a feather! Inside: merino, bamboo, silk noil, angelina, sari thrums, mohair locks, angora firestar. The finished batt is divided into two batts, but are extremely similar. This batt will go to one lucky winner (details are below!).


And to boost your skills at the same time, here is my extra copy of Spin-Off magazine to add to the batt giveaway:


So, you'll get one blended batt and one magazine for this giveaway.

But wait, there's more! To accommodate those who aren't spinners yet, I'm adding handspun to the giveaway. Here's the yarn:


The awesome stuff in this yarn includes: merino, pulled silk, bamboo, angelina, tussah silk, angora, yarn, cormo, and lots of other bits of this and that. It's very squishy. :) It's a 2-ply bulky yarn with about 80 yards in all. The whole skein is just about 4 ounces, and there is plenty of yarn to make a chunky hat, mitten cuffs, or a cowl.


To be clear, here is what you will get for the giveaway:
  1. Blended batt and magazine
  2. Handspun yarn
Here are the details of how to enter to win. There are numerous ways to get your name into the hat for the drawing.
  1. Follow my blog! (Post in comments below)
  2. Follow me on Twitter! (Tweet at me so I can give you an entry)
  3. Like my Facebook page! (Post on my page so I can give you an entry)
  4. Choose which item you want for the drawing (either batt/magazine or handspun)
  5. Name them! What would you call the batts? or the handspun? (post below or on Facebook)
Those will give you one entry each, but you can get multiple entries. I'll post mini-challenges on my Facebook page from now until November 28, 2014, and if you participate, I'll give you another entry. I'll announce the winner via random number generator on November 29, 2014. Lots of entries means your chance of winning will be higher!

Also, here's how the batt looked before. I made two, very similar batts and blended them together to make one giant batt:


Extreme closeup!!: 

Thursday, November 20, 2014

Dye Brand Color Comparisons

The dye brand testing is over, at least for the goals I originally set, so now it's time to chat about the characteristics of the colors produced from each brand. (If you haven't followed my testing, here are the links for the reviews of Brand 1, Brand 2, and Brand 3.) It's easy to assess the differences in colors when you look at them in person, but since computer monitors might be tuned to different parameters than mine, I'll do my best to describe the colors. Here we go, The Yellows!:


Brand 2 is missing because the dye powder refused to be combined with water to form a solution. Now, Brand 1 and 3 yellows turned out to be nearly the exact same shade. That isn't too surprising, since most dye companies will have similar yellows. The thing which I noticed most between these two yellows is the quality of the color. If I compare the wool or nylon fibers, the yellows are very similar. However, when I look at the two silk samples, I can tell that the yellow from Brand 3 yielded a stronger hue than the yellow from Brand 1. That said, Brand 1 covered the fiber more evenly than Brand 3 (there were fewer white spots on the Brand 1 samples).

The Reds!:


I actually liked all of the reds, and I was a little surprised how similar they turned out to be. Brand 1 (on the left) turned out to be a paler ruby red, especially on the merino. For all of Brand 1 dyes, the colors turned out significantly paler on the merino than the other fibers I used. Brand 2 was the perfect sexy red you would see on the lips of an attractive model with smooth skin...and you would be extremely tempted to buy that lipstick. The goopy consistency of the dye solution didn't make the fiber sticky, which I feared, but the goopy-ness made me worry that I wouldn't get consistent colors from batch to batch. It turned out a bit more splotchy than Brand 3. Dye Brand 3 had the best dye coverage on the fiber, but it isn't quite so ruby red as Brand 2--Brand 3 turned out to be slightly more orange-y on the nylon fibers--it turned out ruby red on the merino and silk.

The Blues!:


The blues were a pleasant surprise. The blue from Brand 1 reminds me of the deep sapphire blue of the Heart of the Ocean (<---you remember this reference, right? It was the hottest item in 1999), but only on the silk (which was splotchy) and the icicle nylon. The dye didn't take very well on the merino (which looks grey-ish blue) or the BFL. Brand 2 reminds me of the caribbean ocean. It has that tropical hue which makes you think about sandy beaches and vacation. It also dyed the fibers extremely well. Brand 3 turned out to have a mix of 1 and 2 colors, so it's a brighter sapphire blue color than Brand 1. It didn't dye the merino as deeply as I hoped, but the resulting blue is a nice middle-of-the-road hue.

The Blacks!:


First, black is a difficult color to obtain on wool in general. Further, to get a deep shade, you usually need a 3-4% DOS (depth of shade = saturation of color), but in all of these samples, I used a 1.5% DOS so I could compare how well the dyes dyed the fibers. When I want to make a darker black in the future, I'll increase the DOS. Brand 1 produced yellowish blacks, though this yellow tint was diminished on the icicle nylon sample. The merino black was most severely tinted yellow when compared to the others. Brand 2 has no yellow tint, but it dyed the fibers the poorest of all the samples. The merino actually just looks grey, and I don't think it would turn out significantly darker even with a deeper DOS. Brand 3 also has a yellowish tint, but it is only a slight tint--it can only really be seen on the faux cashmere. The merino dyed to the best, darkest, shade than the other two. I expect the 3-4% DOS with dye Brand 3 to return the best results overall.

I know pictures on a computer screen aren't the best way to discern the differences between slight shade differences, but I hope I have elucidated some of the reasons why I went with dye Brand 3. So, what's my plan for these samples? Well, I don't really need to keep the full ounce for each color of each brand, so I think I'll be making some batts in the near future. Yay! Have you found these posts helpful? Let me know in the comments below!

Sunday, November 16, 2014

Review: PLY Magazine Winter 2013 Issue, Part 2

As promised, here is my personal journey in making woolen yarn, I was inspired to keep trying after reading the Winter 2013 PLY Magazine issue. I've mentioned several times that I'm just not very good at spinning woolen yarns, and I think many people fall into my boat. I learned how to spin worsted first, and kept using that method before I even knew that woolen spinning existed. And when I did learn about woolen spinning, I was too interested in leveling up my worsted spinning so I could make usable yarn. Now that I think I'm pretty good spinner, I'm interested in developing and leveling up my woolen spinning skills. Since I've already gotten a handle on worsted spinning, I get a +5 bonus to Dex. :)


For those of you who are still getting into spinning, don't fret. There's no right way to learn how to spin, or do things in an established order. The mere fact that fiber needs to be twisted just enough to make yarn will help correct any issues you have in making yarn, so let loose and make yarn! There are plenty of people out there who have learned various methods simultaneously, and if you're this kind of person, hopefully someone will post some extra tips in the comments below. *HInt*


I've attempted to make woolen yarn over the years, but something would go wrong, I wouldn't know how to fix it, then I got frustrated and left it alone for a while. I keep coming back to the woolen method because I don't want to be defeated by something, which for many, is so easy. So, while I was reading this issue of PLY I was reading it with the goal of learning, rather than just weighing its content for my audience. Before spinning woolen, I needed to prepare my fiber. I grabbed my blending board, which I've been using more and more lately, and made about 100g of rolags. The way you build up fiber on a blending board is an art, so I will delve more into the details for that in a later post.


I used my super soft Orry merino fiber (from MMFWOOL), super soft dark brown huacaya alpaca (from Santa Claus Alpacas), and cashmere (Mongolian) to make the rolags. Mr. IT Guy complained of having cold ears during the winter, so this fiber combo would erect a barrier to the wind. I layered the fibers down so that the cashmere was sandwiched between the merino and alpaca. Cashmere usually has a staple length of less than 2 inches, so it is important to blend them together like this so the spinning is smoother. I can't remember how many rolags I had in the end, but it was probably around 25, about 4g each.


I set up my wheel with the larger whorl, and I also made sure that the uptake was a little greater than I would want it to be for spinning a worsted yarn. These two things help keep the yarn from becoming overtwisted. The larger whorl gives you a little more time to adjust the diameter of the yarn as twist enters the partially drafted fiber, and the faster uptake also gives you something to pull against as you draft away from the wheel. I didn't use just one article from the PLY issue to help me spin my woolen yarn, since there are so many useful hints throughout the whole issue. I kept it closeby as I spun so I could troubleshoot quickly. Perhaps they should offer a special spiral binding for those who want to lay the magazine open next to their wheel!

Generally, I was holding the fresh yarn with my left hand towards the wheel, pinching the twist, and pulling away from the wheel with my fiber (right) hand. It was tough going at first, but I managed to spin the whole skein this way. With my 4g rolags, I was able to get 4ish draws per rolag before I needed to add in a new rolag. I learned that you don't want to try to spin too much fiber at once since your arms are shorter than you think. :) The two difficulties I faced most frequently were muscle cramps in my pinching hand, and keeping the diameter from varying too much. These issues will resolve when I get better at woolen spinning, and the hand cramps will go away when I stop using two hands to spin woolen--most people only need one hand.

The results of my best attempt are:


The yarn turned out better than I hoped, and would only get better. After skeining it up, I washed it vigorously in hot soapy water, then rinsed it in hot water. I didn't want to shock the yarn too much, but I did want the fibers to hold onto each other a little more. I smacked it in the tub a few times, then gave it a few snaps by pulling the skein taught between my hands. I let it dry without any weight, and the yarn was very well balanced--a contrast to my earlier purple yarn that I posted about. In all, I made a worsted weight woolen single with about 178 yards.

Then came the project! I picked out a masculine cable hat pattern from ravelry, and made a custom fit for Mr. IT Guy. Once it was done, I wanted to felt it just slightly so it would prevent all wind from penetrating the fibers and making his ears cold. I didn't record the total amount of shrinkage, but I would guess that it shrunk about 5% from its original size. I had some extra yarn leftover, so I made a giant pompom for the hat. That was a brilliant idea, since now Mr. IT Guy looks so gosh darn adorable when he wears the hat. And the best part of this project is: Mr. IT Guy's ears are safe and sound in their little warm hat.

(I'll post pictures of the hat when the sun isn't shining so brightly through our windows!)

Woolen yarns have their place among the spinning world. Their helical structure traps heat beautifully and makes the warmest mittens, hats, and scarves. Whether you have a drop spindle or spinning wheel, this issue of PLY should be on your reference shelf.

Tuesday, November 11, 2014

Playing with my Blending Board

I've nearly owned my blending board for a year now, and I think I finally understand how to use it. And how to make yarn from the rolags it produces (which is very important!). I'll talk a little more about my blending board in other posts in the future, especially when I talk about my most recent attempt at making a true woolen yarn. As you can see in the following pictures, the rolags are a bit smaller than my first attempts at making rolags:


There is always a learning curve to a craft or sport or whatever, and though I am familiar with drum carders, and blending boards seem similar, these tools require different approaches to applying fiber and removing it. The reason these rolags are smaller is two-fold: 1) I used less fiber per board. I put on enough fiber to cover about 1/2-2/3 of the length of the tines, as opposed to covering them 100% as I did for my first rolags; 2) Instead of getting one giant rolag per board, I got 3-4 rolags per board. Making smaller, fluffier roalgs is a necessary step in making rolags which draft easily for making woolen yarns. 


In my first attempts, I was simply trying to figure out how to use the blending board. As a result, I made a few not very good rolags. :) I overpacked fiber into the blending board, partially because I was brand new to the tool, but also because I wanted to know what it could handle. Judging from the rolag I made, the board was able to handle a lot of fiber, but it was a very dense rolag. It was spin-able, and produced some excellent art yarns:


To make those rolags, I applied the fiber, filled it with yummy goodies--angelina, locks, silk, etc.--then rolled the whole bit of fiber into a giant jelly roll rolag. By constructing the rolag this way, all of the goodies were in the center of the rolag. Each rolag I made this way weighed about 40-50g, and after I attenuated the fibers (pre-drafted), it was a very textured bit of roving. The results were gorgeous...but it wasn't the easiest thing to spin. It wasn't so bad when I was spinning an art yarn, since keeping lots of texture was my goal, but I knew it would have given my hands cramps if I wanted to spin a smooth yarn.

To learn more about blending boards, I observed how other people made their rolags. There still aren't too many tutorials on the Internet which showcase the variety of ways to use blending boards, just the basics. Still, it's useful to know what's out there, and you never know when you'll learn something enlightening. I got some useful ideas, but I didn't want to read every tutorial out there and do what everyone else was doing--sometimes I like to discover things on my own. Personally, this helps me figure out how to fix my blending board related problems and explore my own creativity.

Since blending boards and drum carders can be used in similar ways, I used some of my own techniques on the blending board. As a result, I now have a method of making rolags so they're smaller and easier to spin smoothly, without sacrificing too much of the goodies. As you can probably identify in the following pictures, these rolags have angelina, bamboo, mulberry silk, and firestar blended in with the merino fiber:


I haven't quite decided what I'll make with these rolags. I have about 20-30 of them, for a total of about 6 oz of fiber. I was considering plying these with another color/fiber and making a bulky yarn for a hooded capelet. I love the idea of having a cape going over my coat--makes me feel all snuggly. I still have some of the blue fiber I used for the base color, so I might use that to make more rolags. Maybe I'll dye up some cashmere and throw that into the mix too! Who knows what I'll do when I have warm thoughts on the brain. :)


I'm nearly to the point of making beginner tutorials with my blending board. I still have some things to figure out beforehand, and what to do if something goes wrong, but they'll be coming soon. Particularly, I'm trying to figure out the best way to make textured rolags for making art yarn which will spin easily. The biggest lesson I learned was that you can't overload a blending board. Less is more, and you'll have a happier spinning experience if you make many fluffy rolags rather than few compact rolags. What fibery things have you been doing? Share with us on Facebook--we love seeing all of the yummy things you all make.

Monday, November 3, 2014

Review: Spin-Off Spring 2014 Issue

Like the 
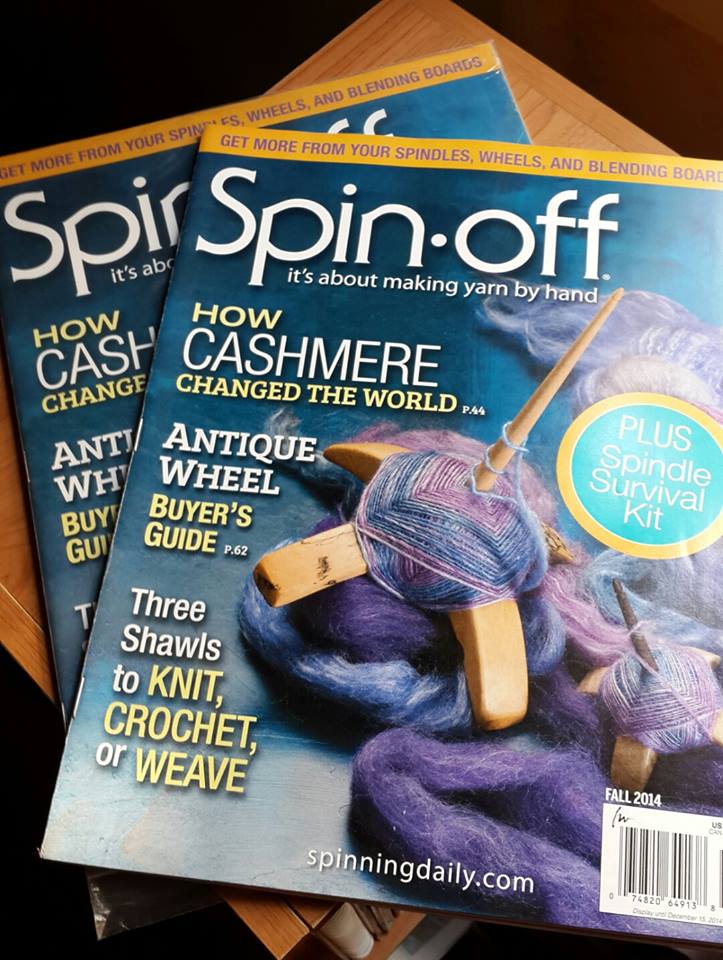
Autumn 2013 issue of PLY magazine, this issue of Spin-Off features colorwork as its primary theme. It has been interesting to see how these particular issues differ, since the PLY issue seems to focus on the well-rounded approach to colorwork--blending, spinning, plying--whereas this issue seems to focus primarily on dyeing and blending to achieve a variety of colors. Both issues work very well in tandem, so if you're really interested in building your colorwork arsenal, these two issues are wonderful resources to have in your library.


Stepping into a new world, color blending can seem very daunting. I have to admit that I encountered some timidity when performing my first color experiments. I kept in mind the color rules of my high school art class...blue and red make purple, yellow and blue make green. But this is a very limiting way of experimenting with color. Luckily, I had two great resources on hand right after I started combining colors on my borrowed drum carder. I had a Munsell color chart (from my school library) which helped me identify hue, saturation, and value of my archaeological surrogate samples I made for the experiments for my master's dissertation. That color chart help me understand how to identify whether a color was bright or dark, and now I can identify the value of a color without a color chart on hand. Now, I know that most people won't have this kind of chart in their home library, but if you're very serious about understanding color, it would be worth looking for it through your local library (and probably interlibrary loan). However, it isn't necessary to have used it to understand color--but it it'll take more time and experimentation to really understand those three indicators of color: hue, saturation, and value. Hue refers to the specific color, saturation refers to the intensity, and value refers to the lightness/darkness.

The second valuable resource was a dvd I got for Christmas one year: Color Works for Spinners by Deb Menz. She's a wonderful teacher, and I love her crazy red hair. She's soft spoken, but really knows her stuff. I felt myself listening raptly as she plainly explained hue, saturation, and value, while also demonstrating it on camera. She chose a color she wanted to make, then chose appropriate mixing colors to achieve the hue, saturation, and value for the desired color. She didn't always get it right, but she talked about how to identify what a blend needs to get the right color. The Munsell color chart and Deb's instruction are what really helped me break out of the high school art class mentality regarding color (also, I'm not implying that all high school art teachers are created equal).

Yet, these magazines will send you on your way to blending and creating beautiful colors. The first article I found most salient for budding colorists was the "Never-Ending Blending" article. You start out with a set of primary colors, then blend together the two adjacent colors evenly (evenly = 50/50 blend of the two parent colors). The more you do this kind of blending, the more gradual the gradient between colors will become. For example, if you start blending yellow and red, your first color blend will be orange. If you blend yellow with orange, your second color blend will be a golden orange color. But this is when you need to break the rules of art class. You don't always have to start with the same three primary colors: yellow, red, and blue. Sure, you can get a wide range of colors, but the blending is still limited. As the author attempted, try using a different set of three primary colors. One of the experiments used the three colors of printer cartridges: yellow, cyan, and magenta. Those color blends will be otherwise impossible to make if you started out with yellow, red, and blue.


If you start out with bright colors, you'll get bright blends, and vice versa with dark colors. Experiment with adding in white or black to your blends in increments of 10% (like, 90/10, 80/20) to change the value of your color. For example, if you wanted to darken an orange, you could combine 9g of orange with 1g of black wool. If you wanted to make it very dark, you could combine 5g of orange with 5g of black. You would lighten the orange similarly by combining it with white.

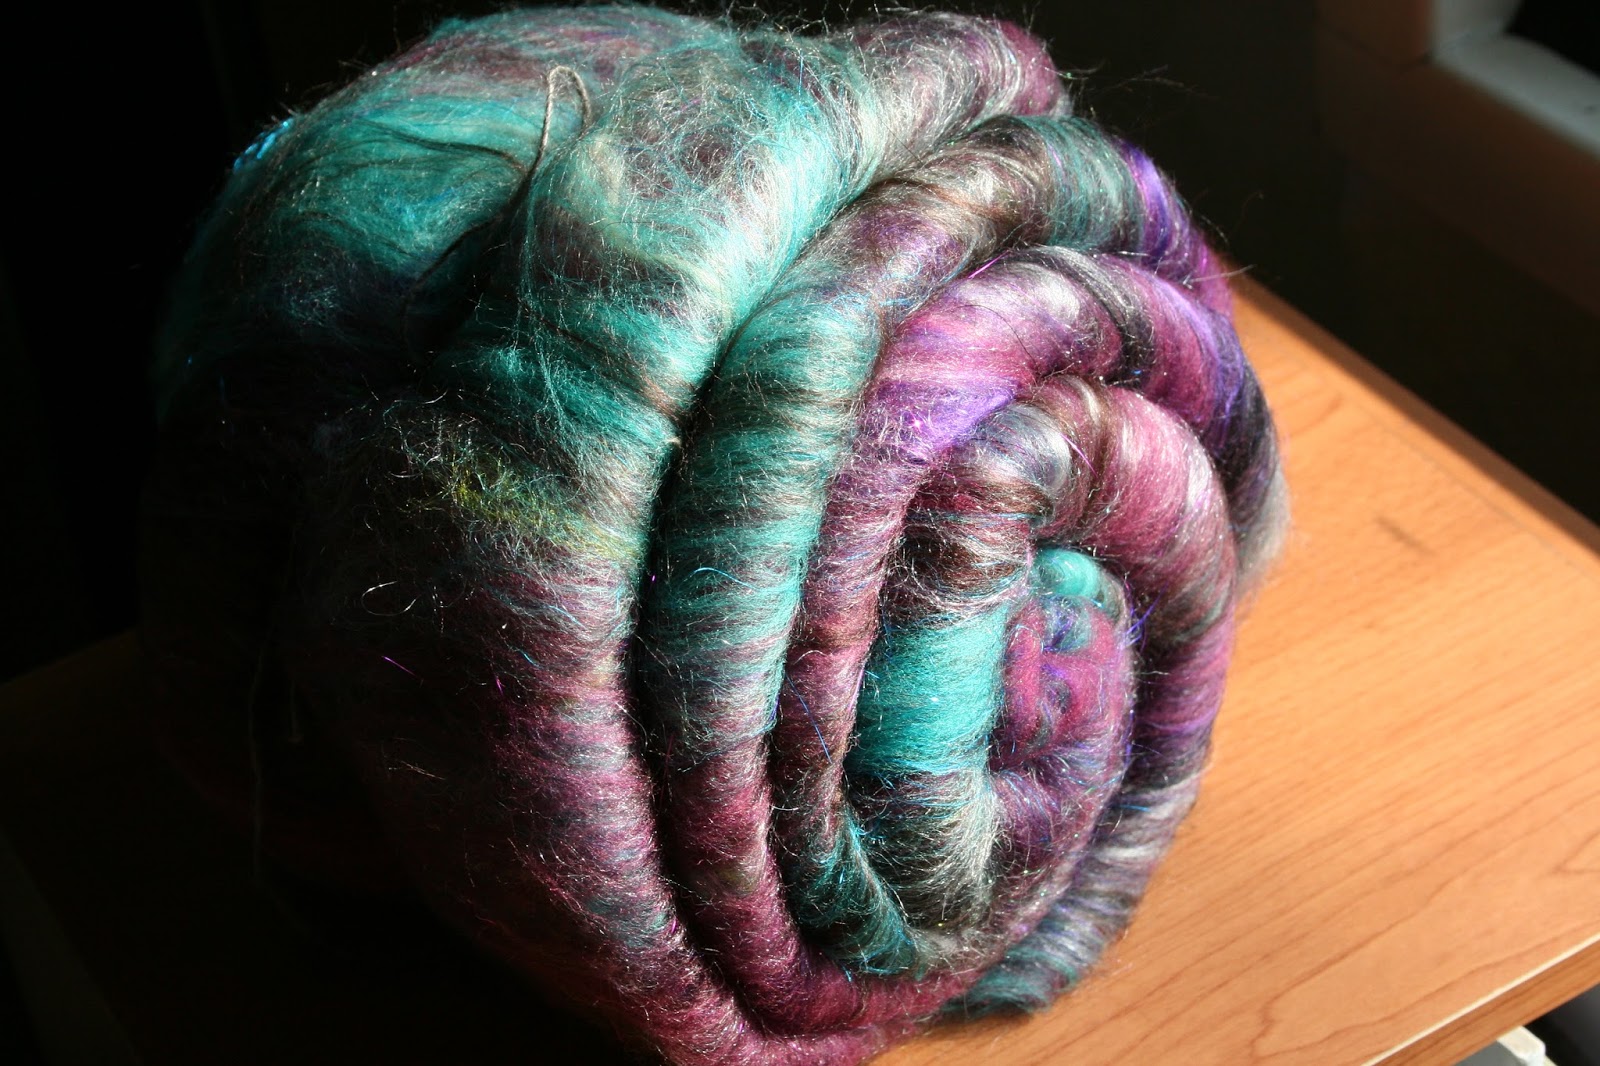
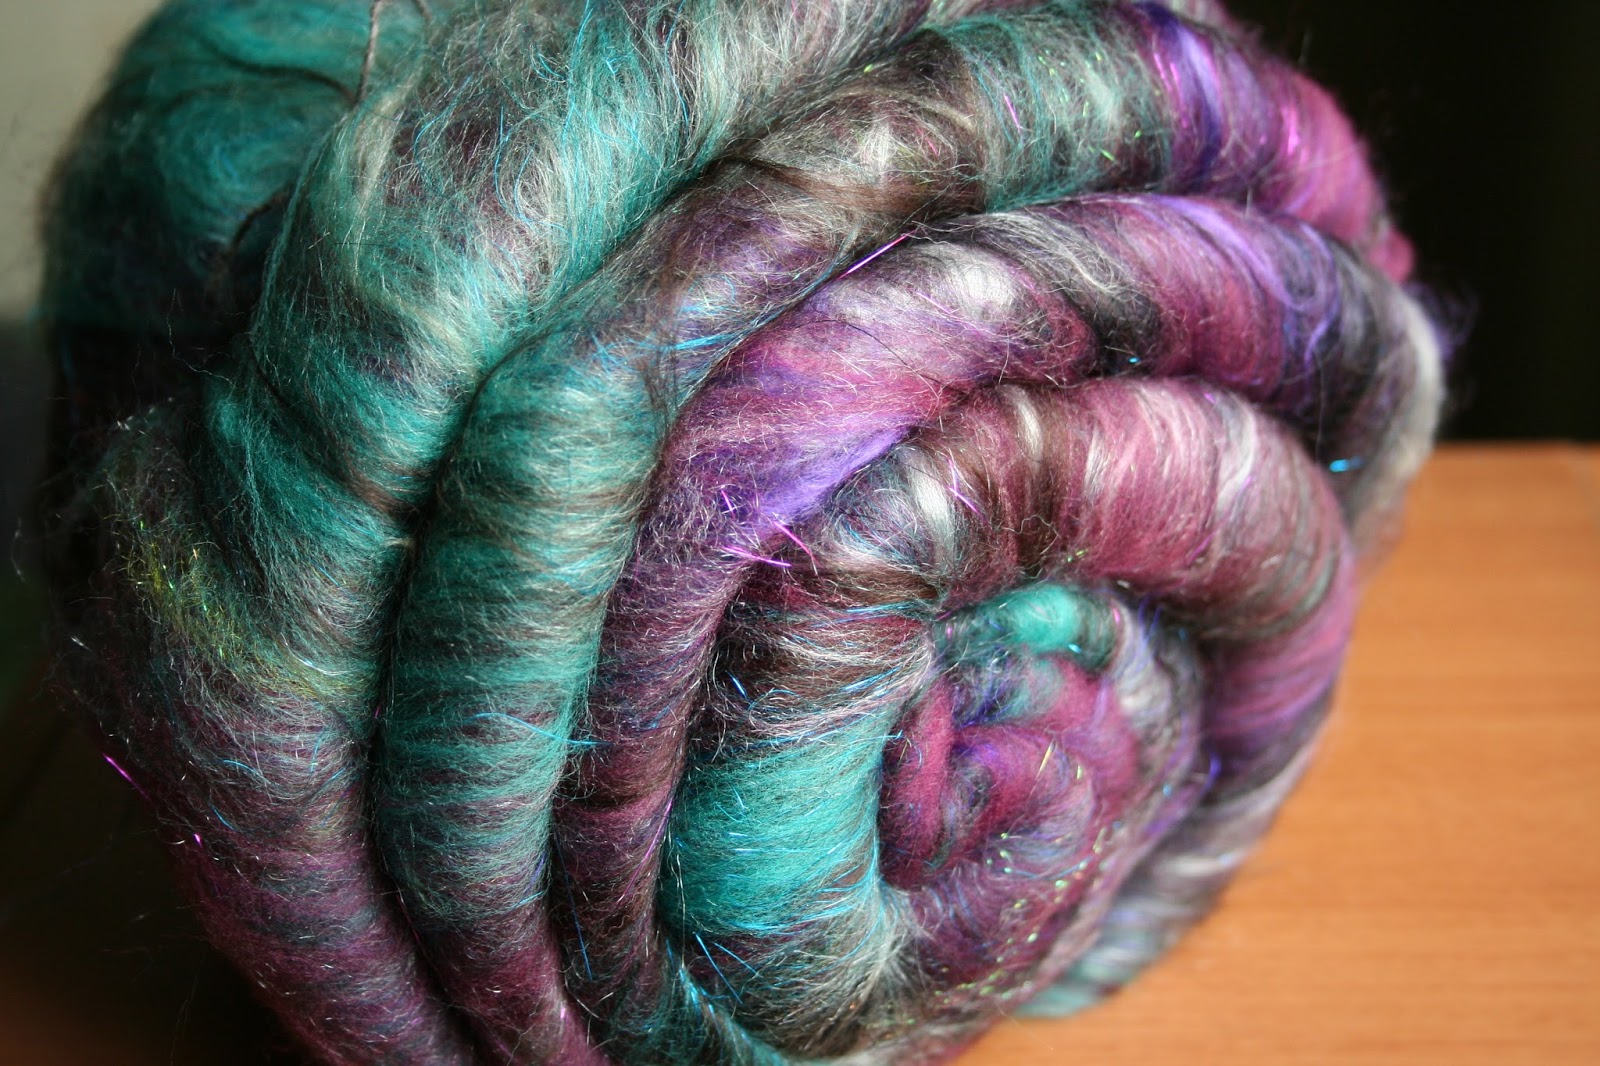
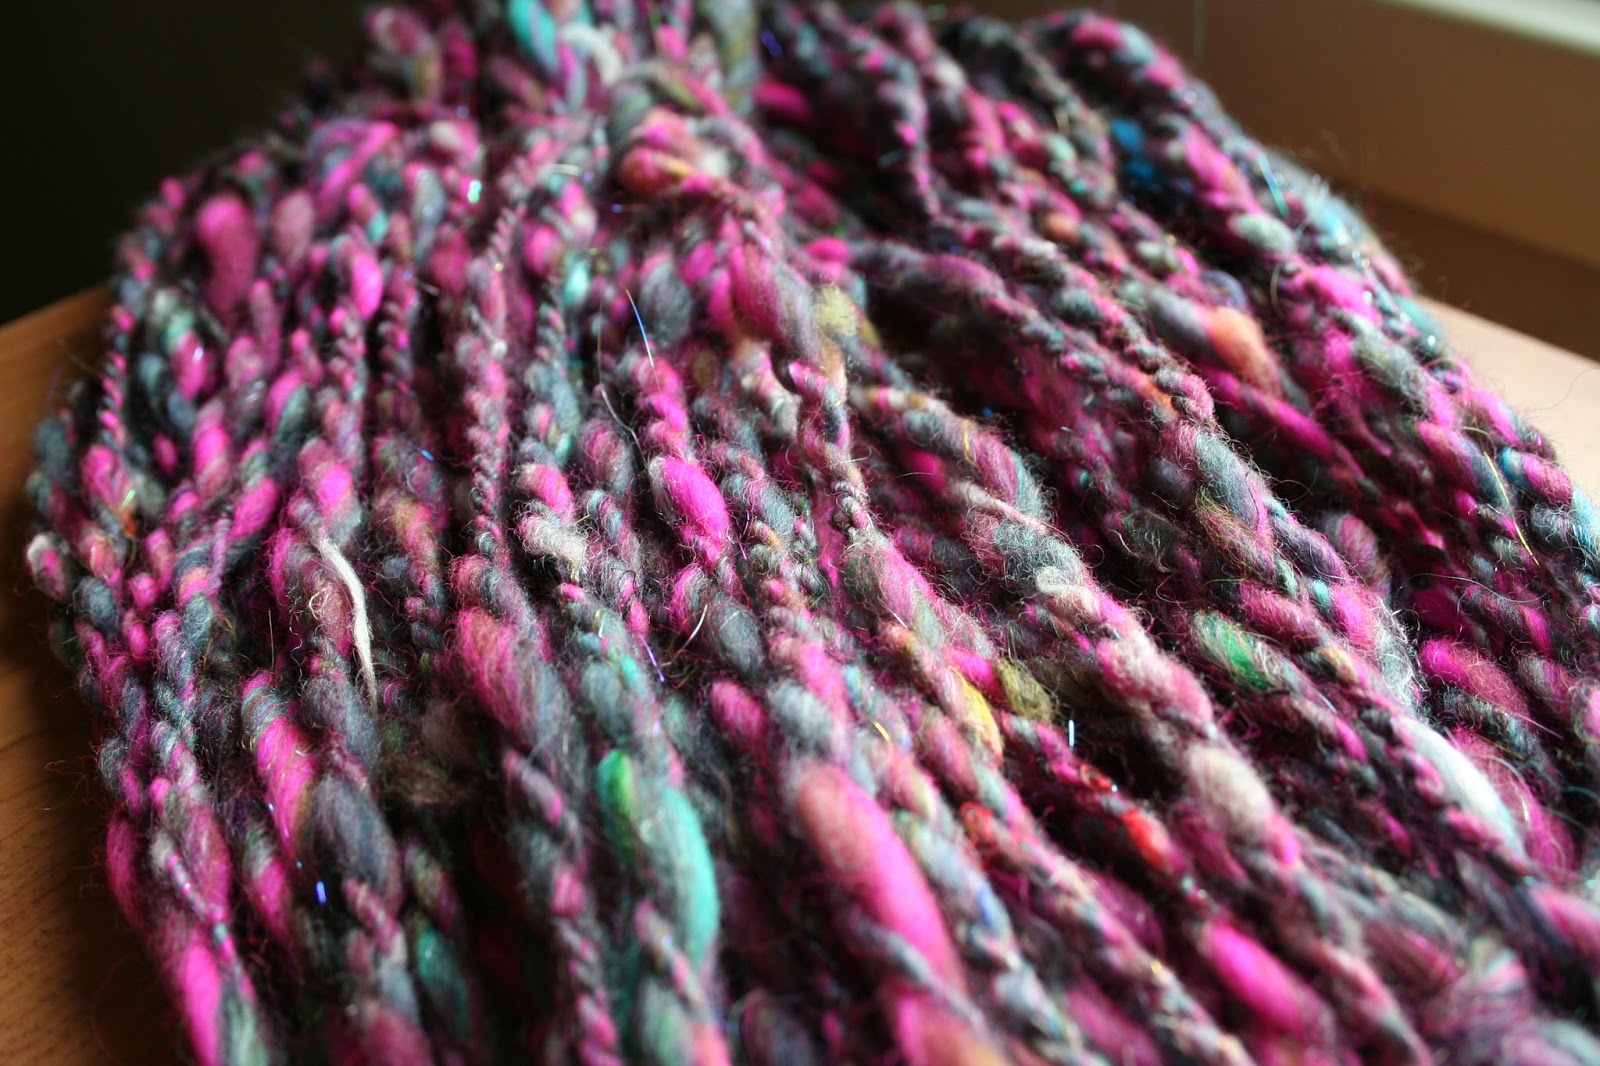
These blending experiments provide an excellent setup for experimenting with making tweed yarns. Tweed can refer to the color of the yarn and it can also refer to the texture of the yarn. For example, tweed the color is made by completely blending together several colors to get one, semi-homogenous color. This yarn would appear to be one color from a distance, but many colors upon closer examination. Tweed the texture is made by adding small noils into the fiber mixture, sometimes in a variety of colors, then spinning it into yarn. This will give the yarn a nubbly appearance. The article "Blending and Spinning Tweed Yarns" introduced me to the proper names for these two types of tweeds: Harris tweed refers to tweed the color, and Donegal tweed refers to tweed the texture (as well as color). Adding the principles behind preparing tweed batts will enhance your colorwork overall, and is a nice way to help mix and match different batts together.


Finally, the article I found very useful for natural dyeing was the article called "Making Dyestock Solutions from Natural Dyes." In a nutshell, it tells you what you need to know to figure out a formula for standardizing your dyestock--which might be challenging given that the extraction of color from natural dye sources can produce a variable yield. With all natural dyes, you won't get 100% consistency from batch to batch. But you can come close. If you keep notes about your dye stock and the depth of shade (DOS) for various saturations, you will produce similar results from batch to batch. As with the above articles on color blending, you can mix and match your naturally dyed fiber to create new colors, and blend them with professionally dyed wool to stretch your naturally dyed colors.


After reading the PLY issue on colorwork, I didn't think I would gain much from reading this issue of Spin-Off. Given their very different approaches on the same theme, I'm happy to have both of these issues in my library. The last thing I need is a shelf full of duplicates.

I hope you enjoyed this review; more reviews will be coming later. I can't do justice to these magazines, so if you find the things I talk about in this review interesting, get your hands on a copy. Hop over to Facebook if you want to share your own personal thoughts about colorwork and your experiences.