Monday, August 25, 2014

Dye Testing: Brand 3 Results

That's it, I'm done! I can finally say that I'm glad this testing phase is over and I can begin doing the fun part of dyeing...making beautiful new colorways. I've mentioned before how important the testing phase is for me, and how it can help you put your dollars into the company that suits your needs, but it is boring. But before I get onto the interesting stuff, I have to finish up with the review for Brand #3, plus I'm going to do a review of each color group, since that was the main defining factor for my final brand choice.

First, let's talk about the things I liked about this brand. All of the dyes could be mixed up into dye solutions without problems. Both of the other brands had some difficulty in this area, which I mention here and here. This is extremely important to me since I don't want to work with dry powders. I plan to live well into my 100s (and, of course, keep my wit) and I don't want to breathe in dye powder every time I want to dye some fiber. Plus, it gets everywhere.

Top: Merino
Middle: Faux cashmere, Icicle nylon
Bottom: Silk noil
For every color, the dyes were completely exhausted for the animal/nylon fibers. There weren't any strange residues leftover, and the fibers felt the same after dyeing as they did before dyeing. Sometimes dyes can make the fibers feel harsh or tacky--not something you want to find out after dyeing a whole prime fleece.

Top: Cotton, Flax
Bottom: Tencel, Hemp
Not only did the colors exhaust from the dyebath, but the colors themselves were clearly saturated on the fiber. I was having trouble getting the black to look black on the merino fiber for the first two brands, but Brand #3 really pulled through. I could increase the DOS (depth of shade) when I want to dye merino black so I can get a deeper black, but at least it didn't turn out gray.

Top: Lincoln locks
Middle: Merino
Bottom: Icicle nylon, Silk noil, Faux cashmere
As with all of my other samples from Brand #1 and #2, I tried to keep a consistent variety of fibers among each color and each brand. For all of the Brand #3 dyes, I used merino, faux cashmere (nylon), icicle (shiny nylon), and silk noil. Those are the same fibers I used in Brand #1 and #2 samples as well. Aside from the yellow, which didn't take the dye well because I didn't wet the fiber completely before dyeing, all of the colors dyed the fibers very evenly. As a result, Brand #3 turns out to be an extremely well-rounded set of dyes.

Top: Cotton, Flax
Bottom: Tencel, Hemp
But there is just one other interesting thing about Brand #3 that I need to talk about. It can also dye plant fibers, which is kind of like computer magic to me. I'm sure to a chemist this might make sense, just like how a computer makes sense to a computer scientist, but it baffles me. Here's why: animal fibers and plant fibers require very different dyeing conditions in order to fix dye to the fiber and have it be color- and wash-fast.

Wool requires an acid and heat to bind the dye to the surface of the fiber permanently. Plant fibers require a base and no heat to bind the dye to the surface permanently. What happens when a base and an acid meet together? Well, you get a third grade science project better known as 'The Volcano.' So, you can't dye both types of fiber in their respective environments at the same time, which leads dye manufacturers to create acid dyes (wool dyes) and procion dyes (tie dyes, plants dyes). And yet, Brand #3 has managed to do something I didn't think chemistry and the laws of nature would allow.

Top: Faux cashmere, Merino
Bottom: Icicle nylon, Silk noil
In order to dye both kinds of fiber groups, you need to create a dye which can be jammed into the fiber's receptor sites when in the presence of a specific mordant. For wool, that mordant is some kind of acid like vinegar or citric acid. When the conditions are right, the presence of an acid and the vat is brought to the right temperature (about 180-200F), the fiber's receptor sites are introduced to the dye particles and the acid plays a major role in solidifying their marriage. The heat ensures that there is enough time to form the chemical bond (usually held at that temperature for 30-60 minutes), and afterwards, it becomes permanent. How permanent? Archaeologists have found 7,000 year old textiles which still have traces of dye on them. Whoa.

Top: Cotton, Flax
Bottom: Tencel, Hemp
So, if that's how you bond a dye to wool, what about cotton and flax? Well, they're the picky noble ladies of the fiber world. The suitor has to be just right and require a very long (by comparison) courting session before they'll accept a tentative marriage. Hmm, let's say that again but without the metaphors. Plant fibers also need to have their receptor sites altered, and in the presence of a base like alum, they're more likely to accept the dye permanently. But they need a bit more time, like 24 hours. And they prefer a cool or tepid environment. Plant fibers are notorious for being difficult to dye, and the well-calculated dyebaths they're put into still won't exhaust completely. Flax is the worst, though the others aren't much better.

Top: Faux cashmere, Merino
Bottom: Icicle nylon, Silk noil
After thinking this chemistry stuff through (again), I think I understand how dye Brand #3 works. Broadbase dyes like Rit will have several different dyes mixed together so it'll dye any fiber, including man-made ones--but the biggest problem here is that it'll never fully exhaust. Since Brand #3 will dye both animal and plant fibers specifically, they must have designed the dye to exhaust well in an acidic environment, but also work decently well in a basic environment too. This isn't a huge stretch to assume if you consider the process of dyeing with natural dyes. With a switch in pH environments, addition or removal of heat, and a change in the duration of the dyebath, you can use the same natural dyes for both fiber groups. I think Brand #3 achieved this versatility by keeping those principles in mind.

Top: Tencel, Cotton
Bottom: Hemp, Flax
At any rate, I think that's what is happening with Brand #3. I could be wrong, and I'd be thrilled to be corrected by someone who knows what's going on, but it has been a nice little brain buster for the last few weeks. Now, without further adieu, I'll give you my choice of brand: #3. I know, big surprise, especially after reading all of my rambling. I'll reveal the names of the brands when I talk about each color in the next post, since I have some things to say about that and I've clearly already written a book with this post. Look for that post in the near future. If you read this whole post, thumbs up to you! :D

Sunday, August 17, 2014

Fleece-to-Shrug: We're Ready to Spin!

If you have been following along on YouTube, you'll know that we're ready to start spinning our beautifully carded fleece into a soft, 2-ply yarn. I wanted to take some glamour shots of the batts before I started spinning them for the continuation of the video series so I can illustrate some points.


As you can see, I top loaded the batt with the lovely add-ins (silk, angelina, sari silk, and icicle nylon). If you look through the Part 5 video again, you'll see me make a fiber/add-in sandwich before I removed the batt from the carder. This technique does a few things. First, it prevents the add-ins from simply sticking to the licker. It takes a bit more practice and experience to make this doesn't happen, making this stage a little easier for beginners.

It also makes the spinning process slightly easier. By being sandwiched with fiber, the add-ins are less likely to fall off the batt. Now, there are plenty of wonderful reasons to put the bling on the very top, but if you're still a beginner, the characteristics of the fiber will help you manage the bling on the batt a little better. Last, it'll subdue the impact of the bling slightly, which will be helpful when you're knitting with the yarn (ie, you won't have areas of intense color, which might overpower the cable pattern otherwise).


Here, you can see the very thin layer of fiber over the bling. It's subtle, but you can crank the throttle more or less if you want, and the more fiber you pack on the very top of the batt, the more subdued the add-ins will look in the final yarn. If in the end you didn't add enough bling for your taste, you can always hold your add-ins together with the batt while you're spinning. I use that trick a lot, and I can even do a video about that in the future if I get enough requests. :)


So, how do your batts look? Did you blend your fiber with other tools? Share your pictures and projects with us over on the Expertly Dyed fan page! <3

Friday, August 15, 2014

An Experiment in Spinning Quickly

I know it sounds strange, but spinning quickly helps you understand which spinning rules have become second nature to you. I originally thought I'd use this fiber to make a high-twist single for plying with bulky yarn to create some kind of stretchy art yarn, but I was suddenly inspired to do something different with it.


Here's what I did. I wanted to make a thick-and-thin single on my drop spindle with big slubs and somewhat thin sections in between. But if you have ever watched one of my videos, you'll know that I sometimes have a hard time making a slubby yarn these days. Using this technique, I have to do it quicly to produce the desired results. Of course, that gave me an idea.


Do you want to level-up your spinning skills? Well, try doing it quickly. First, start out with something simple. When I'm not paying attention to my gauge, I naturally make a sport weight 2-ply yarn. Most beginners will fall into one of these categories, which makes it the best first step with this experiment. Just pick up some basic wool, and spin about 1 ounce at whatever gauge you find comfortable. Do it quickly, and don't stop to fix the gauge, erase slubs, or any other fixes. Let go and see what you make. When you're done, assess the results. What do you love about your sample? What do you hate? Which spinning skills are second nature? Which areas do you feel you need to improve? This is an excellent way to determine your abilities as a spinner, while increasing your proficiency at the same time.


Now that you've done your first experiment, try something else. Do you have trouble with thin yarns? Thick yarns? This is one area that you can improve on a regular basis. It also increases your ability to switch from one thickness of yarn to another, which is a valuable skill for a spinner. Even if you plan to spin mostly X or Y yarns, it's still worth learning and practicing the others from time to time. They're like exercises for your brain and fingers.


Now let's talk about my yarn. I've always loved looking at thick-and-thin yarn made by people which looks soft and airy, with gigantic, poofy slubs. Normally when I make this yarn, it's not as poofy as I want it to be.

I used some rolags I made with my blending board, made of mostly merino with a dash of silk. I drafted them slightly, but kept them as fat as I could. Then I spun the yarn, keeping the slubs nearly the same size of the rolag when I could. The bits in between can easily load up with extra twist, so it was important to make sure that I wasn't imparting too much twist in these thinner areas. As you can see in the pictures, there is some curling going on in those thin spots. This is normal for these kinds of yarns.


Here are a couple of close-ups of the curly bits. In the end, the slubs turned out a little smaller than I had hoped, but I'm nearly there. This experiment has shown me that thick-and-thin yarn is almost second nature to me now! It'll take a little more practice to get the slubs a little larger, but overall, I'm happy with how it turned out. It's extremely squishy and nothing feels overtwisted. I encourage you all to step out of the box and just give something a go, doing it as quickly as you can. We aren't going for Guiness records, we're just ignoring the need to be perfect--which is a good thing, right? As always, share your projects with us over on the Expertly Dyed page! :)


Saturday, August 9, 2014

Fiber Review: Cormo/Rambouillet Fleece

I made this post over two years ago, and I have some updates to add to this review. I burned this fleece. Just a little. This was back when I didn't understand what a basic pH could do to wool, and how important it was to not scour the wool 100%. My mistakes means you and I both learn from them, so keep this in mind while you read the following post. If you want to know more about how I wash fleeces now, please check out this video series on YouTube:


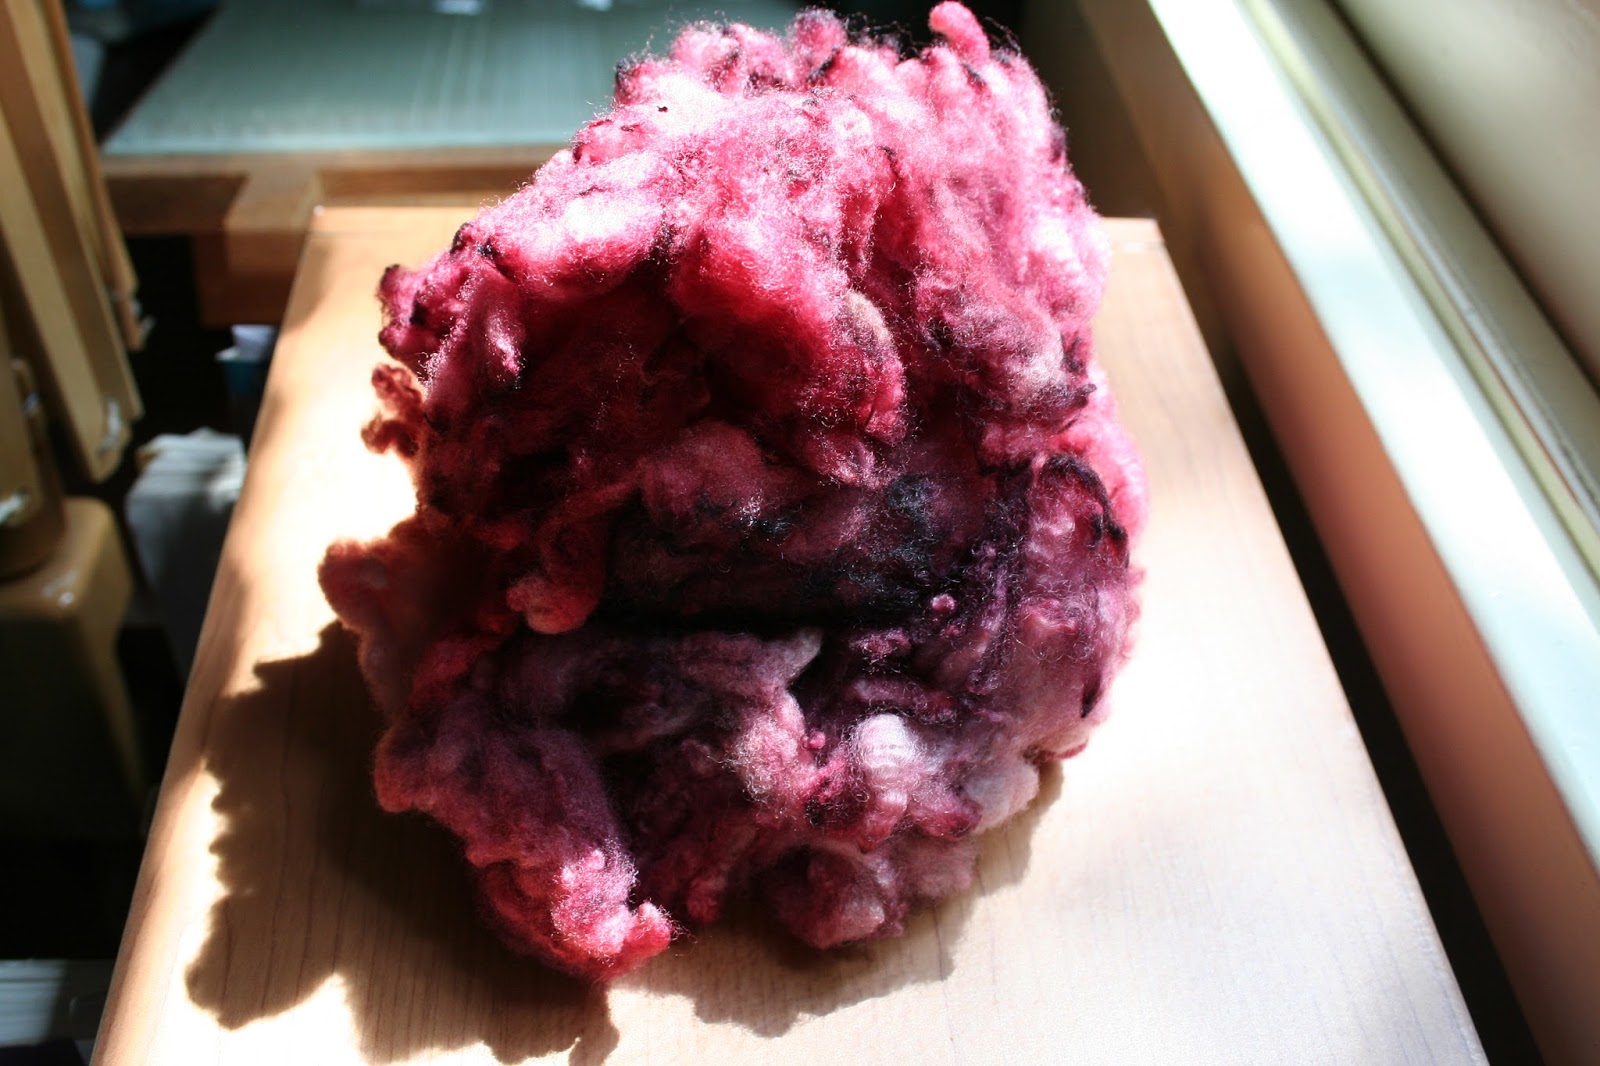
In addition to playing around with the undyed fleece, I used this to test some of my test dyes. I attempted to produce a warm brown color, but alas, it produced a burgundy wine color. I'm not sure what I'll do with it, but I might blend it with some other colors and spin something up. I think a highly textured yarn will bring out the qualities this fiber has--what's left of that, anyway. I can tell now that the fiber feels slightly brittle, so the less manipulation I do, the better for the yarn.


Originally posted on March 25, 2012:

Last September, I bought a beautiful cormo/rambouillet fleece from boydandbeescandles on Etsy. They list only a few fleeces at a time, and they seem to get snapped up pretty regularly. They don't have any in stock as of this moment, but I imagine that there will be soon, since shearing is happening shortly! You could probably ask when the fleeces will be ready too. Here's the actual listing I bought. Let me tell you briefly about this fleece. The fleece was properly skirted for tags and other unsightlies, then wrapped neatly into a ball and placed in a appropriately sized box for shipping. When I unpacked it, it was lovely and sheepie and SUPER soft. Instant love. I washed a sample, weighed it, carded it, then spun it. Though the sheep were not coated, there wasn't an inordinately large amount of vm (vegetable matter).

Long story short, I picked and separated and washed the entire 8 pounds of wool, and now I have a ton of carding ahead of me. But what to blend it with? Or should it be blended at all? The primary reason is to talk about the characteristics of the wool itself, and the changes it undergoes when blended with a different fiber. Here's what I started with:


Exhibit A:

The pictures go in order of unblended fleece, 50/50 cormo/alpaca(huacaya), 50/50 cormo/romney, and 80/20 cormo/silk. I tried to do a variety of diameters and plies, while keeping the sampling under control. Really, the sky is the limit on blends, spinning methods, plies, etc.


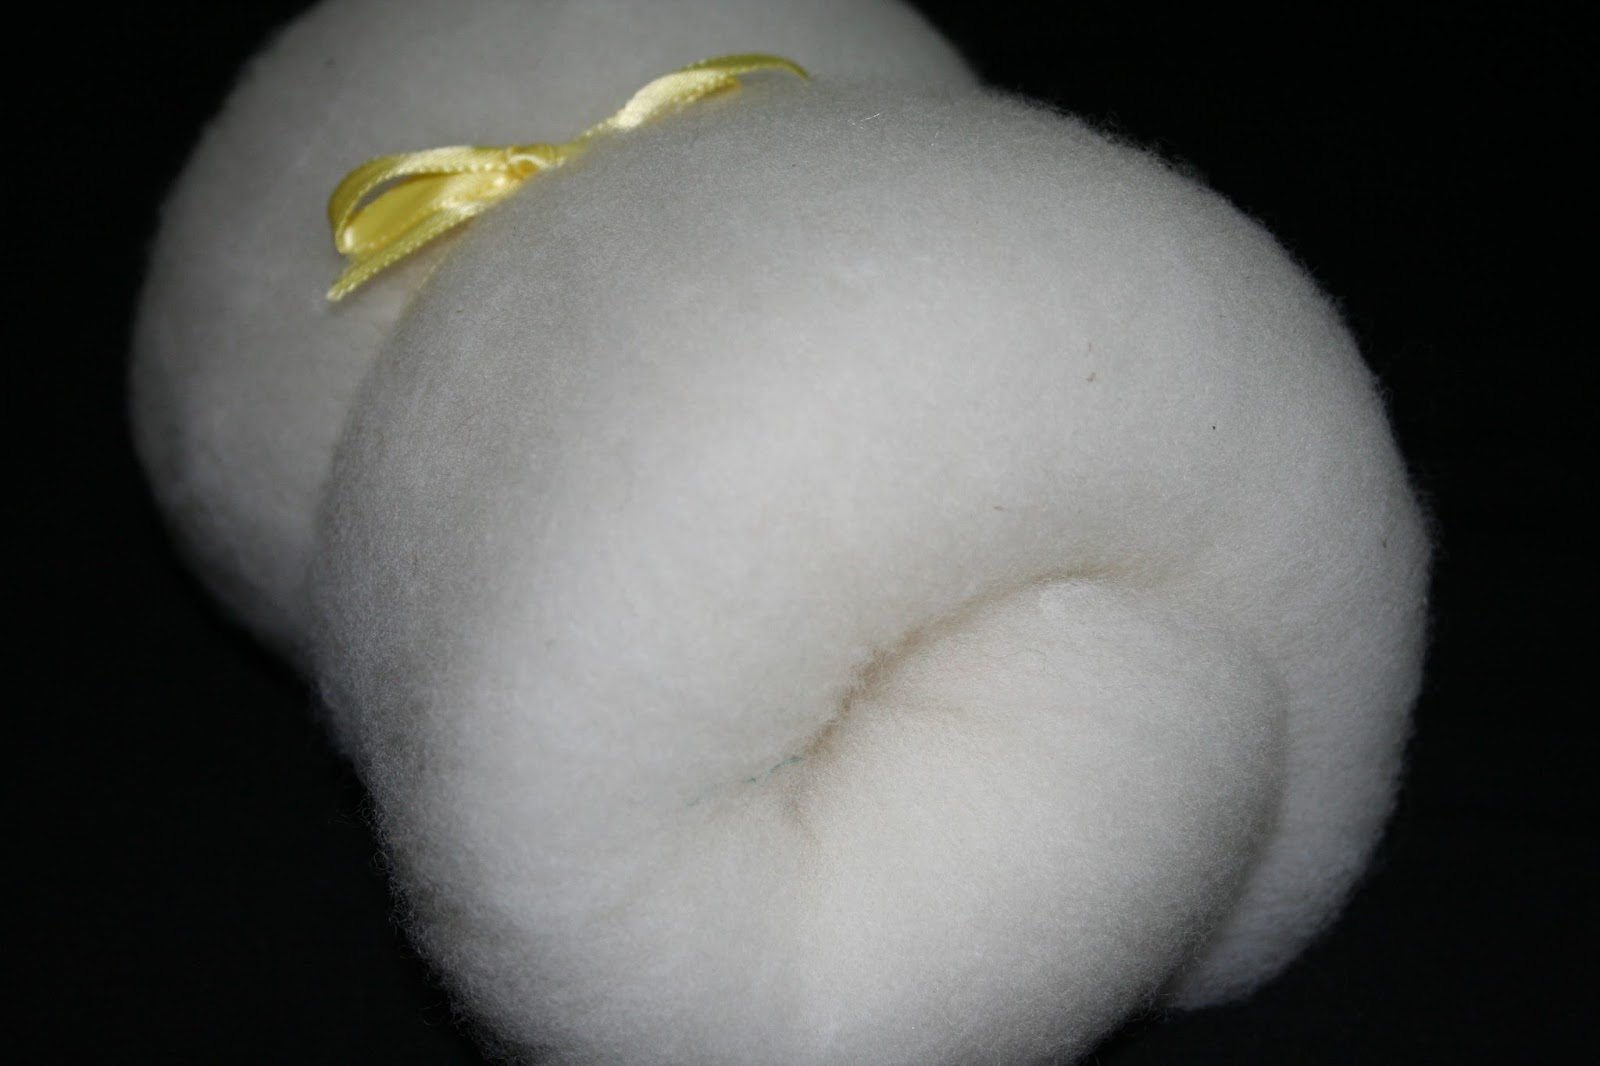
Exhibit B: The unblended cormo/rambouillet fleece


This is the fleece carded up and spun, just as it is. It turned out to be a mega poofy yarn, with tons of bounce and loft. It's way bouncier than any merino I've spun so far. If you're looking for a fiber that feels lighter than air after it's been spun, then this wool is perfect for you. I can see why people like to make baby items with this stuff. :)

I should have dyed the wool prior to/after spinning so I could have better pictures, but we won't talk about my lack of foresight. This wool can really fool you though. You think you're spinning at 24 WPI, then you ply it on itself to check the twist, and you're looking at an 8 WPI 2-ply--normally, that would end up being a 12 WPI 2-ply. This kind of testing is important if you plan to spin for a project, and not the other way around.

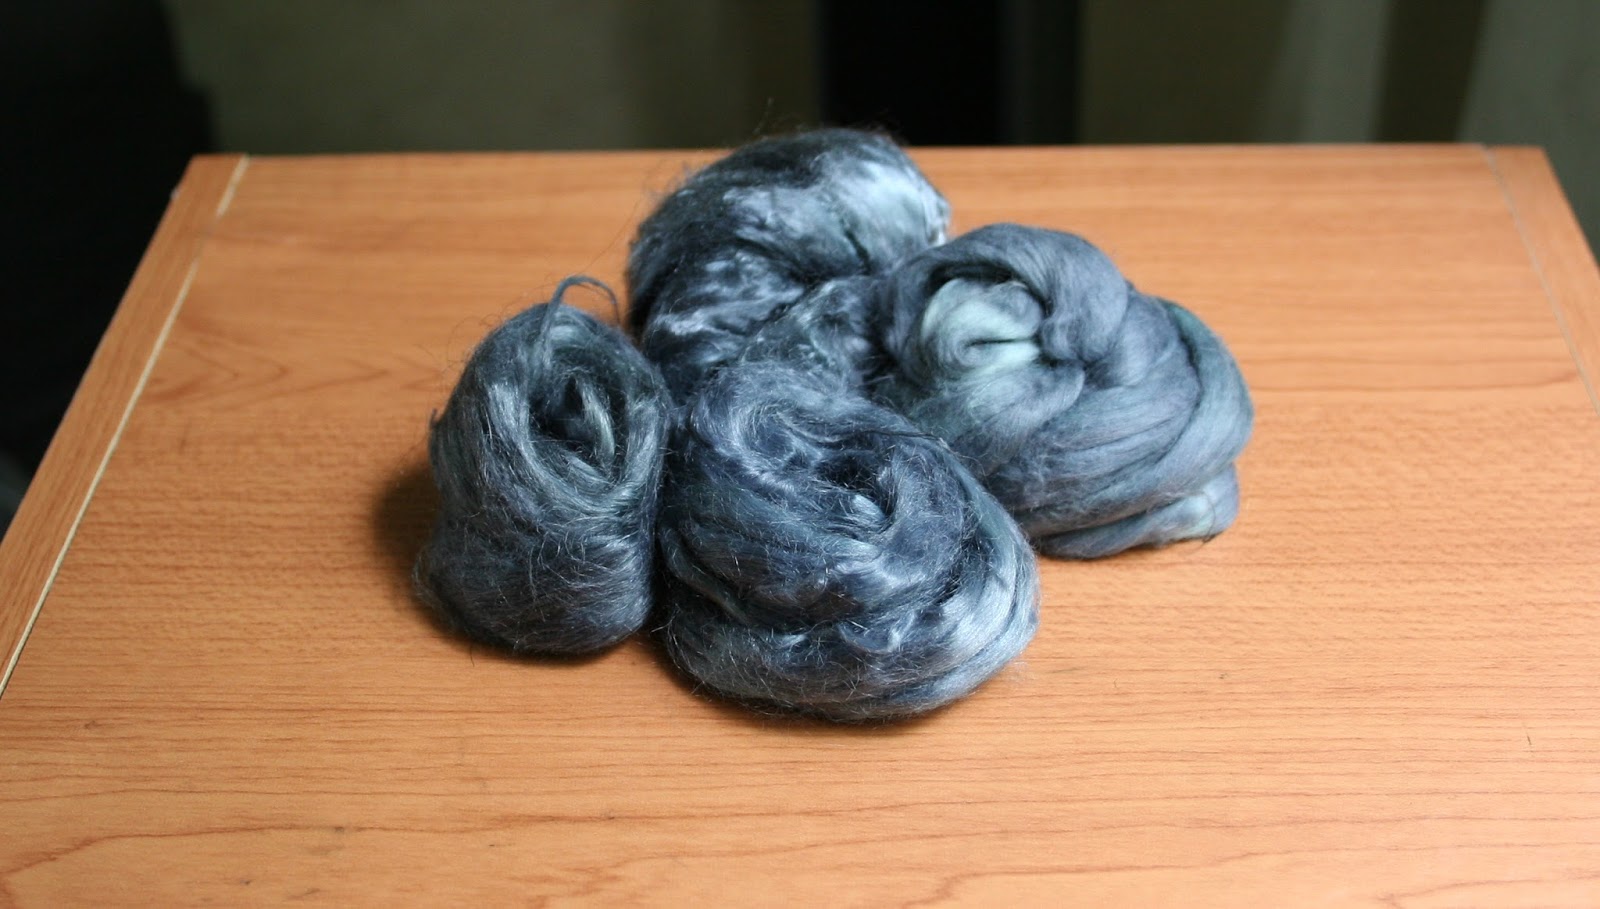
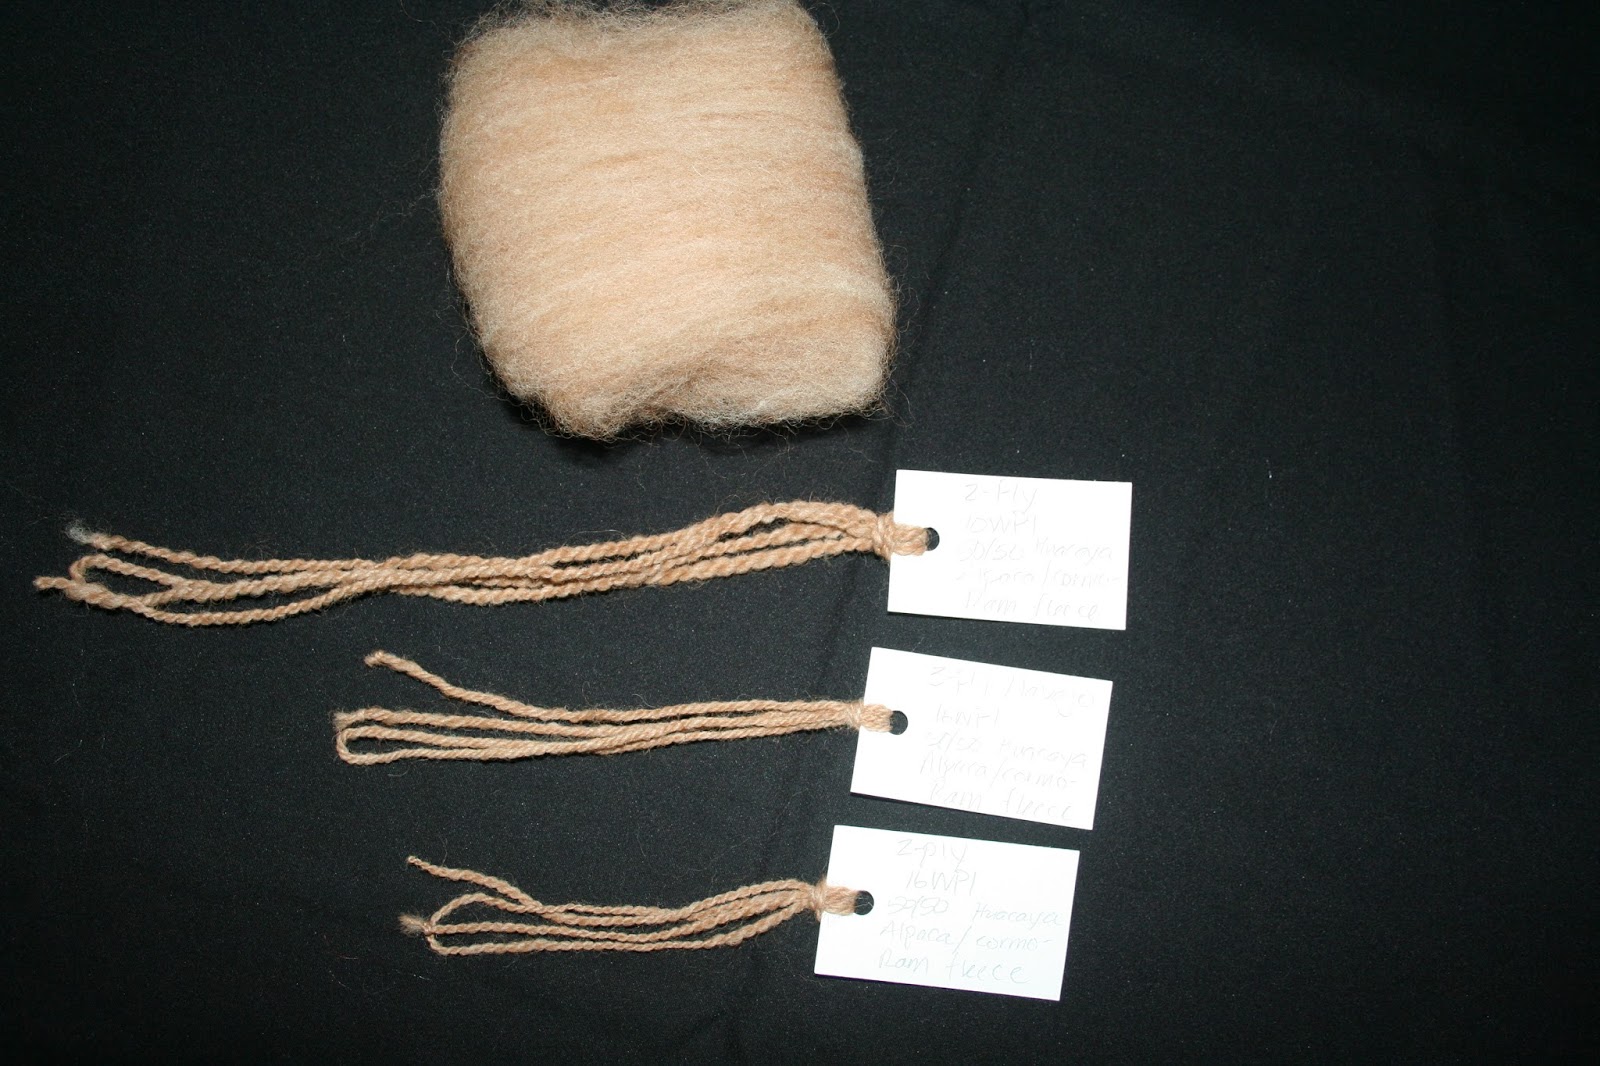
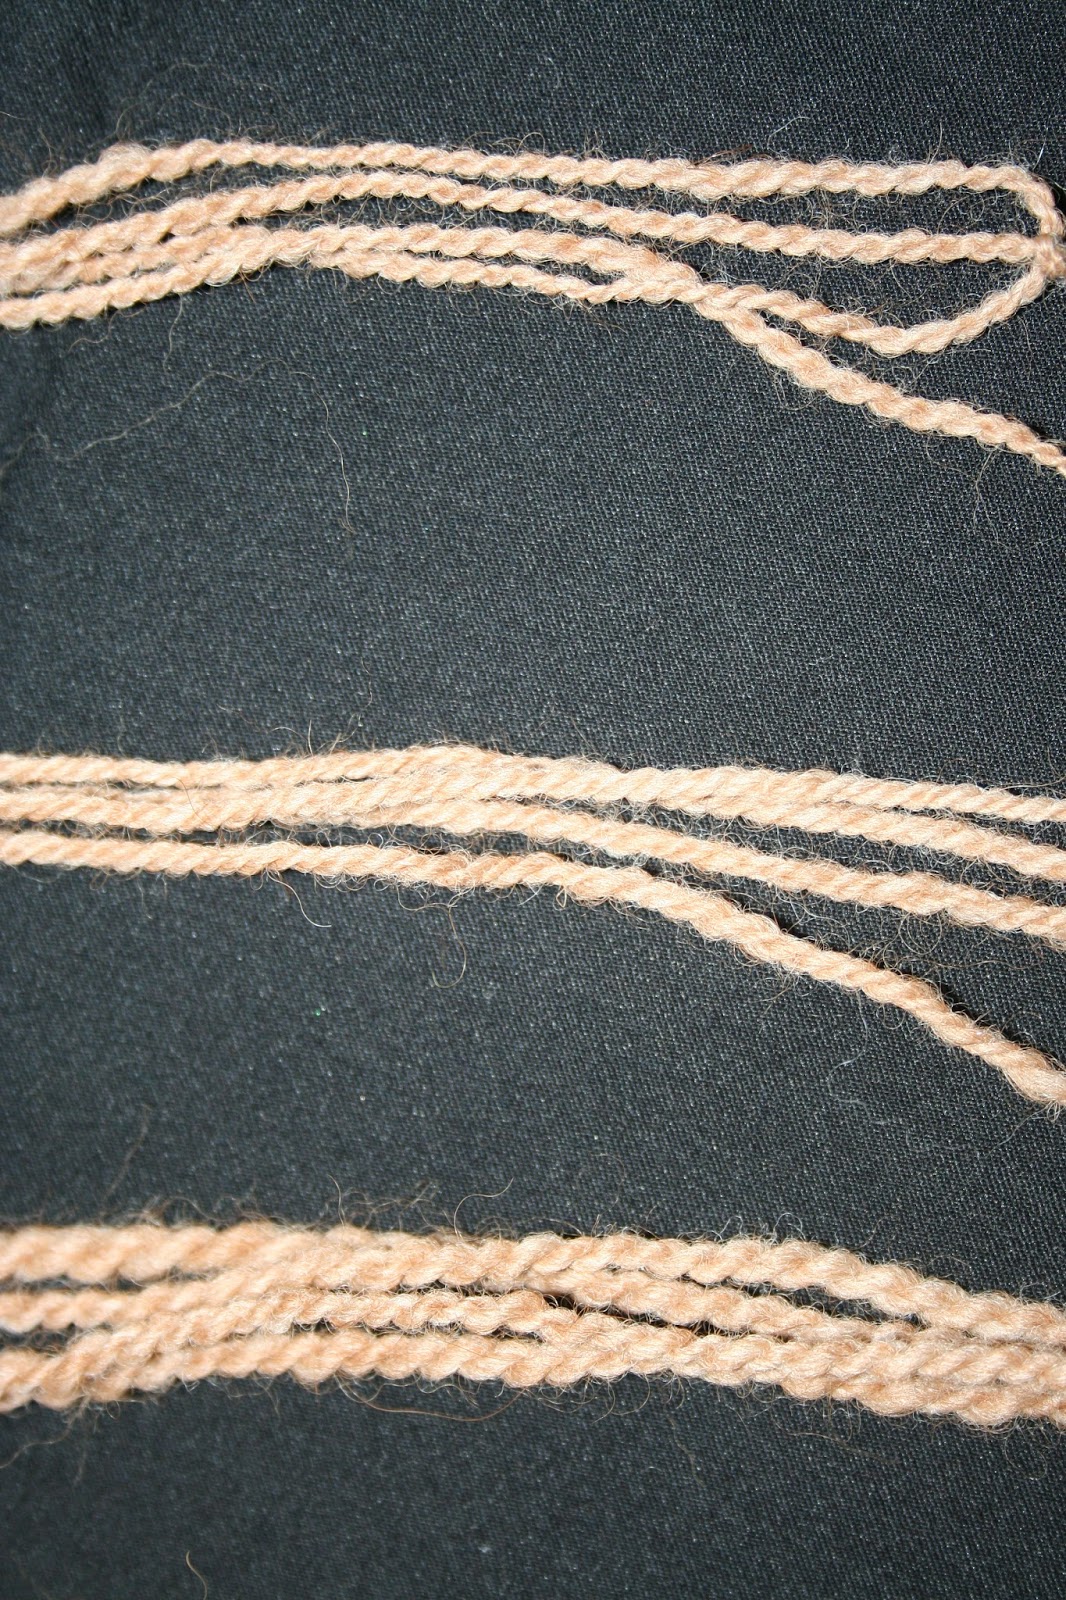
Exhibit C: The 50/50 cormo/alpaca(huacaya) blend


I really like this blend because it makes the cormo feel a bit silkier because of the alpaca, and the alpaca provides a beautiful halo. I also really like this buttery caramel color. It kind of reminds me of peanut brittle. Of the four sample blends I made, this one was the softest and the easiest to spin. I was also able to spin a thinner yarn for each of the categories too. With the blend in these quantities, I feel that you'll be getting the best features of both types of fibers, though you would probably get this result with as little as 20% alpaca (80/20). It's not quite as bouncy as the unblended batt, but it was just as airy.

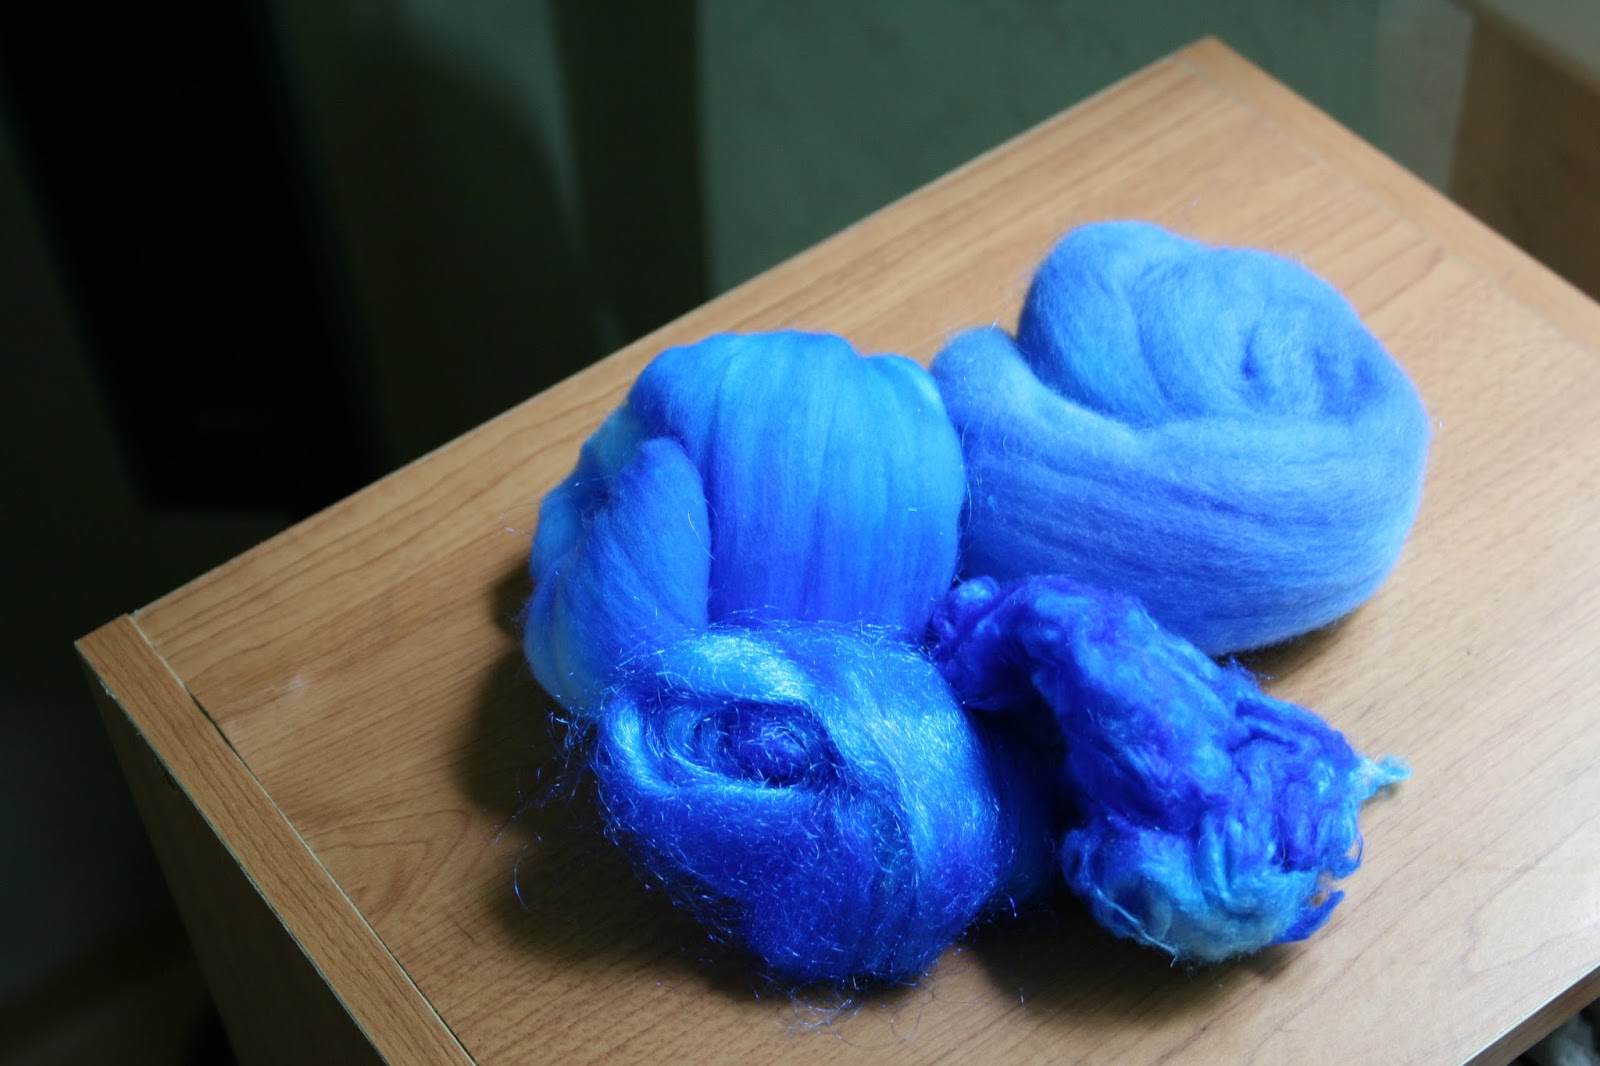
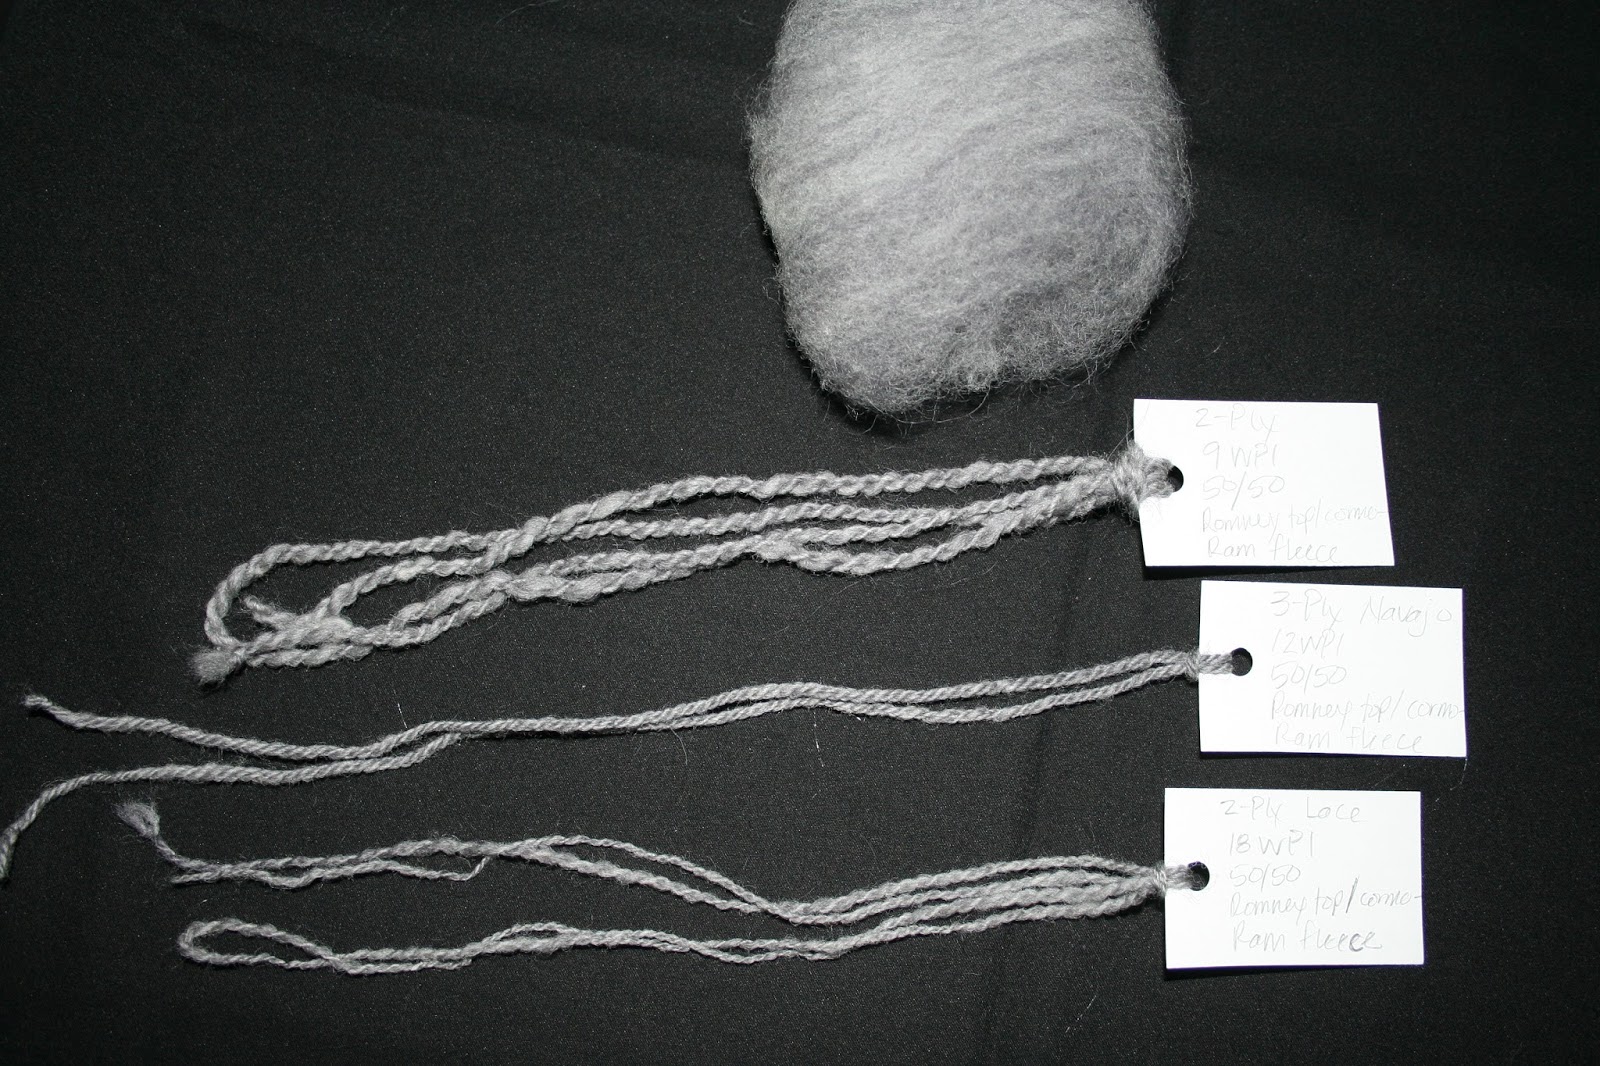
Exhibit D: The cormo/romney blend


Romney is a beautiful long stapled wool that has great strength and abrasion resistance, but it doesn't say "wear me around your neck." However, I think I may be onto something here! This 50/50 blend of cormo and romney pulls the positive aspects from both fibers just as in the cormo/alpaca blend. Because romney is a coarser fiber than cormo and alpaca, it's effectiveness in the blend was a bit more severe. I noticed that there was much less crimp and loft than in the cormo/alpaca blend, but the cormo did make the romney feel much softer.

If you're interested in making a sweater that's soft and will resist pilling/abrasion, a combo including around 20-30% romney will make that sweater last longer. The same goes for a scarves, mittens, and socks.

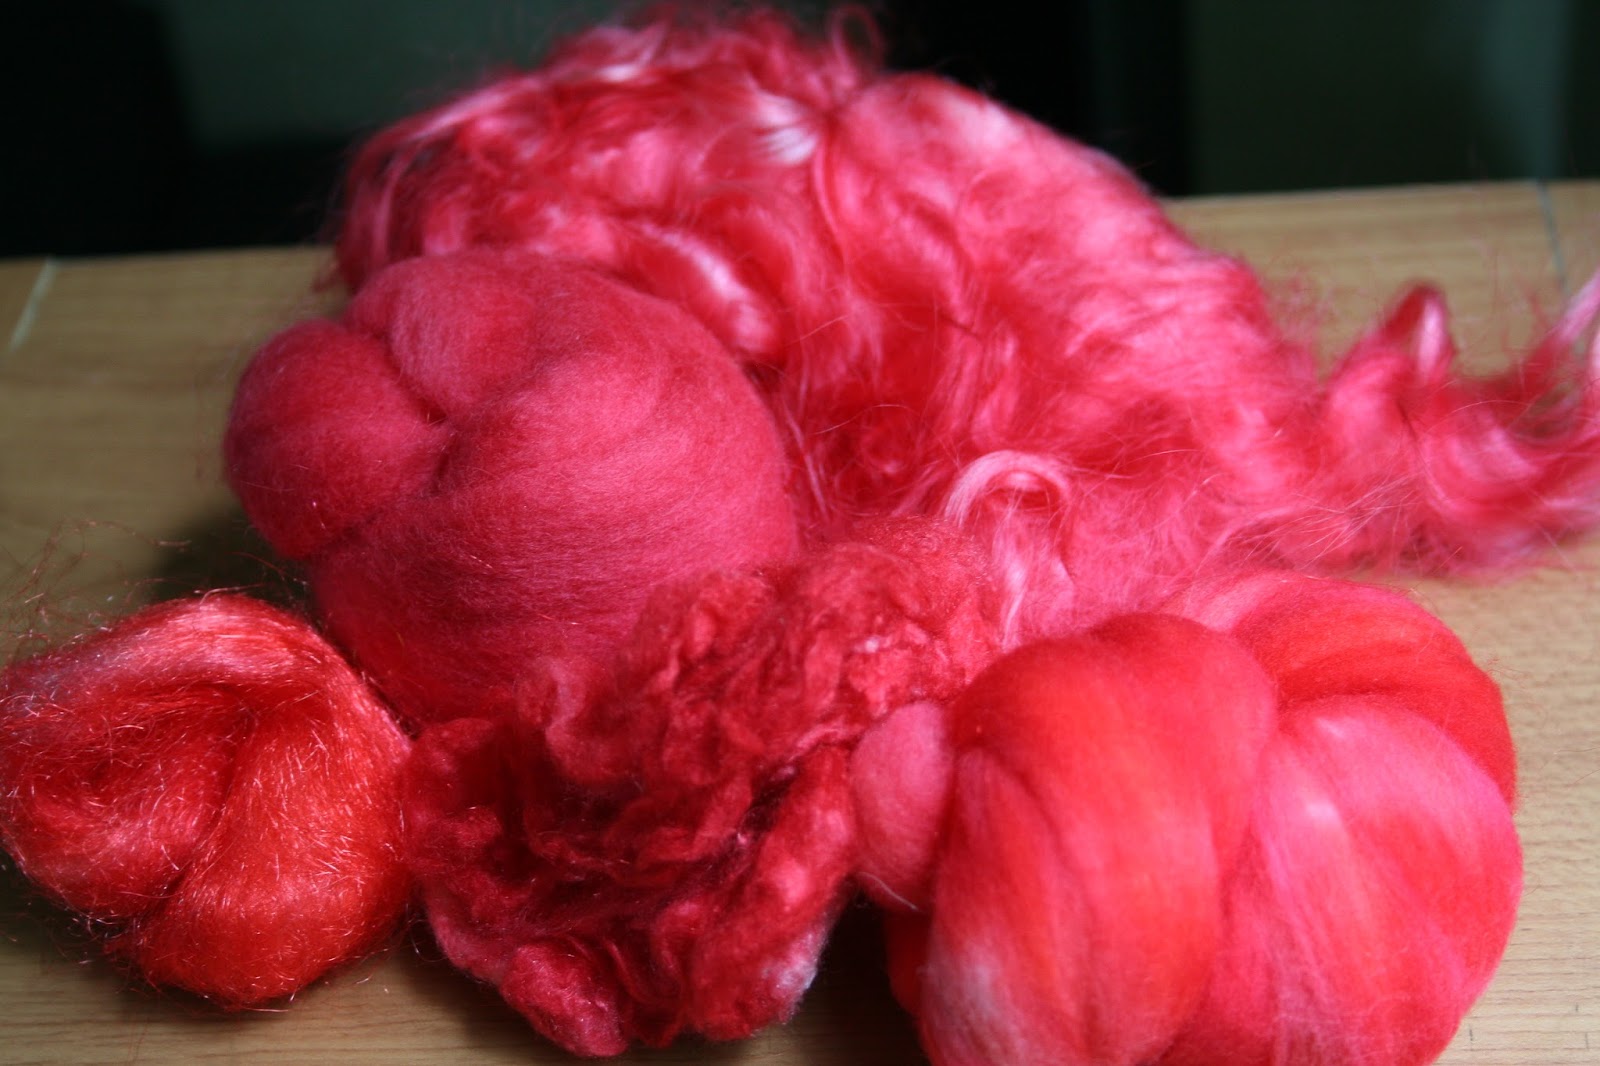
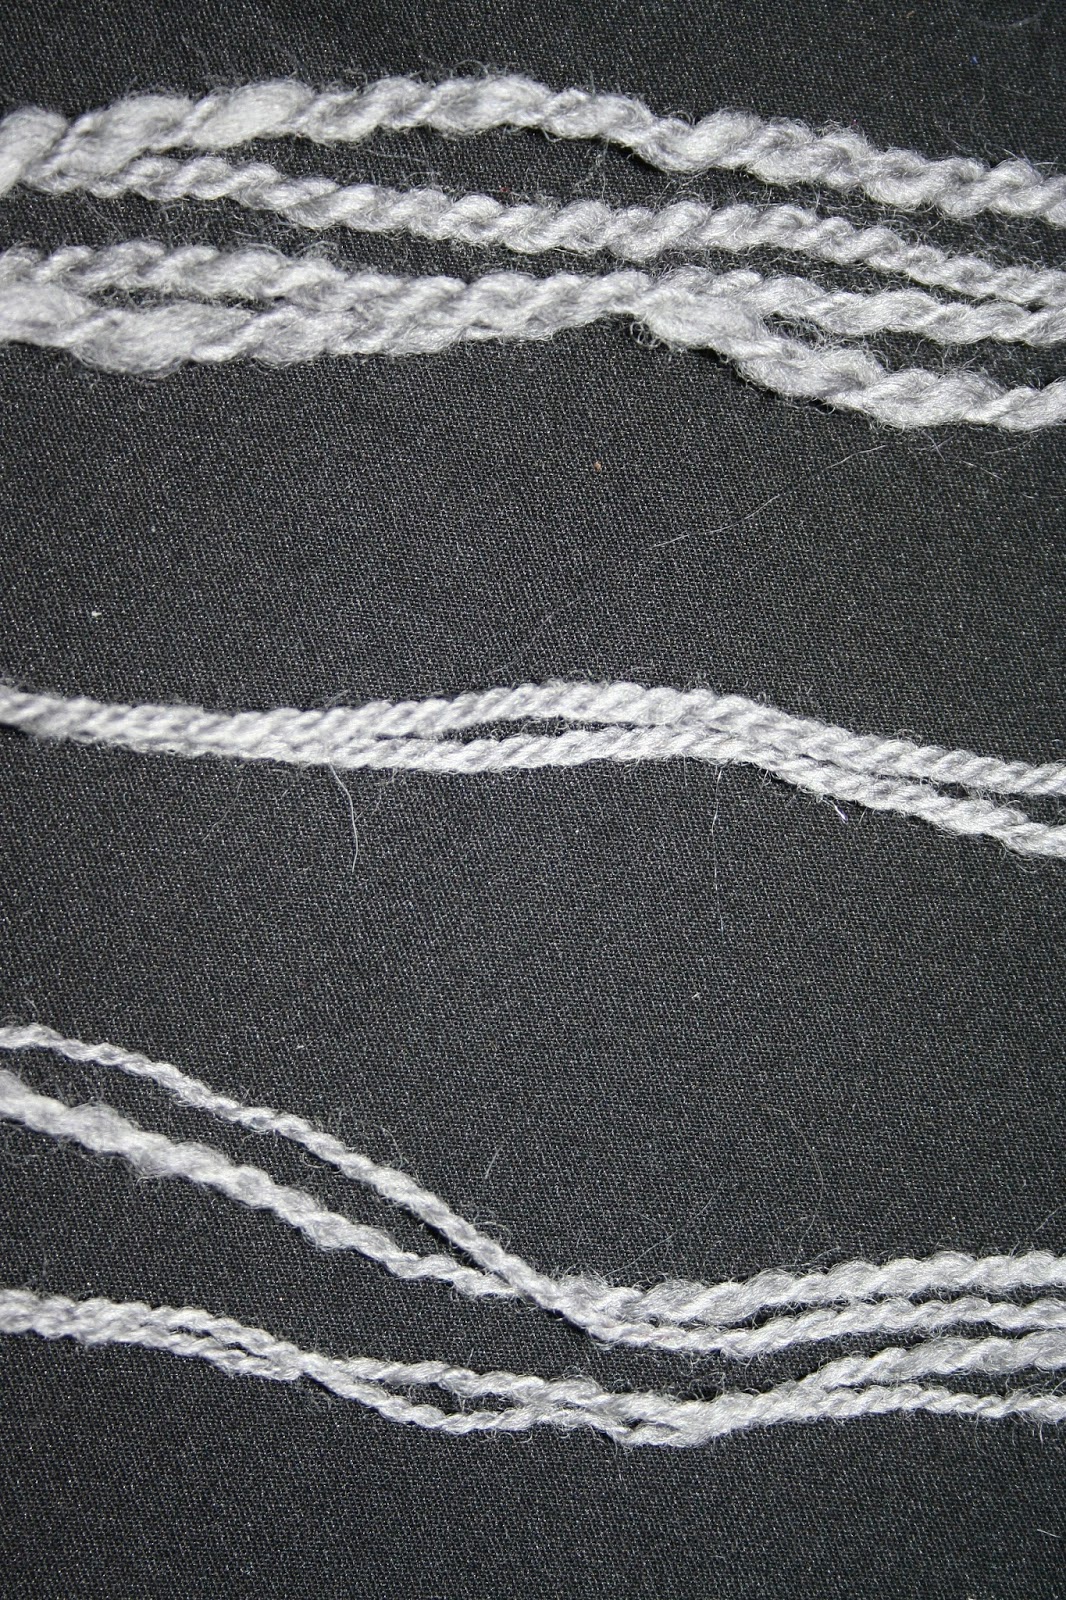
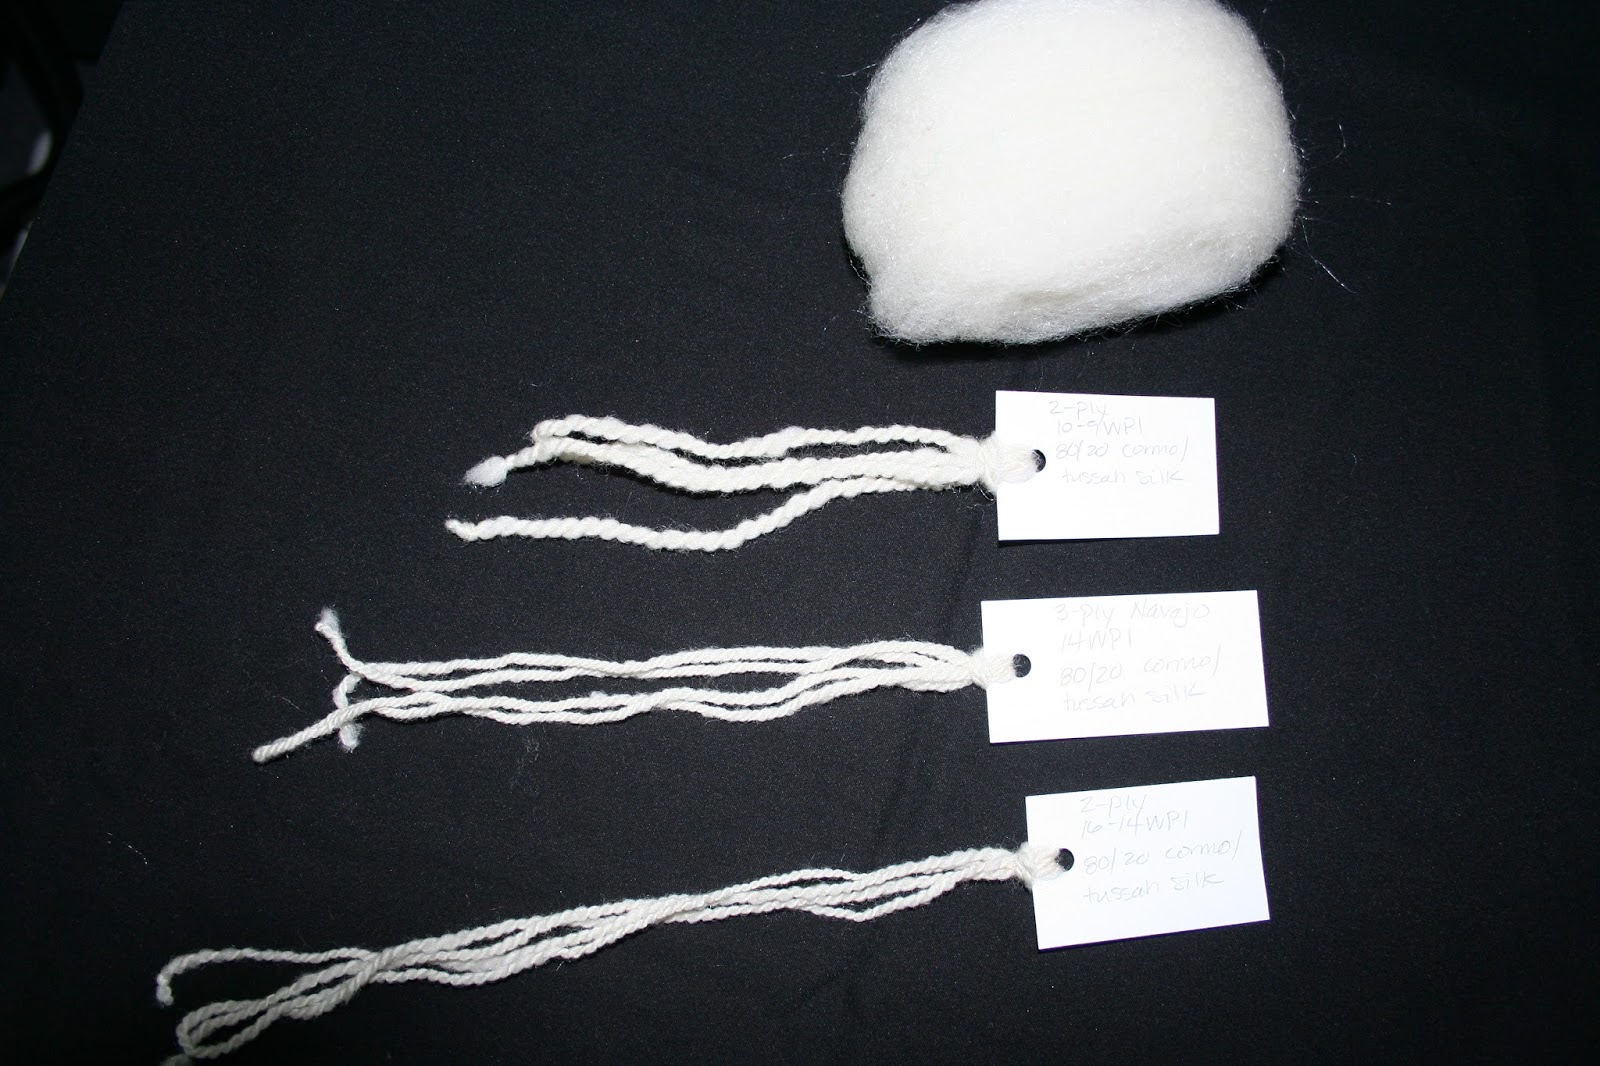
Exhibit E: The cormo/tussah silk blend


This is a luxury blend! The silk is so shiny! I didn't have any dyed silk on hand that I could use, but you might still see how shiny it is in the close up sample (versus the unblended sample). I did an 80/20 blend since a little silk goes a long way. Because it's much finer in diameter than the cormo, it didn't take much away from the bounce or loft of the cormo, which I really liked. If you wanted a structural difference in the yarn, you could probably produce a blend of 50/50 cormo/tussah, and the silk will start to straighten out the tight crimp of the cormo. But that's a lot of silk. Also, that much silk would make the yarn heavier.

I tried a 50/50 blend of cormo/bamboo and it was excellent at softening the crimp of the cormo, so I imagine you'd have a similar result with silk. This would make the perfect blend if you wanted your blend to have a little sheen without sacrificing the beautiful bounce in cormo.

Okay, there you have it. A "mini" blog post about my cormo/rambouillet fleece. Be sure to follow me on Twitter and Facebook so you can get the down-low regarding me and SALES! And coupons too. :)

Tuesday, August 5, 2014

Tutorial Video Companion for the Free Cora Shawl Pattern

I hope these companion videos help you out while you're working on my patterns. I know I haven't made a companion video for my Yuna shrug yet, but I will. It'll be part of the fleece-to-shrug video series, so I'll be hitting two birds with one stone. 

Originally posted on March 13, 2013:

And they're live! The videos, I mean. :) I'm sorry for laughing a bit too loud in video two--I forget that my mouth was right next to the mic. If you'd like to see how I "gently block" the sample, let me know on Facebook and I'll make a video about that.

If you didn't see the Cora Shawl pattern already, you can find it in this post.


If you decide to make any alterations to the pattern (which I encourage you to do!), please write down the notes and send them over to me. I want to make a companion pattern full of user submitted changes to make this pattern part of the Expertly Dyed community. All credit will be given back to the creator, and if you used a handspun or artisan dyed yarn, include that info too!

And as always, if you're having a problem and you can't figure it out, I'm always here to help. You can email me or post it on my FB wall. Share photos when you're finished too! I'd love to see them. :)