Tuesday, December 31, 2013

Happy New Year! Time for a Resolution

Ah yes, 2014 is literally right around the corner, and it's time to sit down and think about what I can do to improve myself in the coming year, or otherwise make 2014 better than 2013 in general. But in order to do that, I need to recap 2013 so I know what to resolve to improve in 2014.

Without going into the nitty-gritty, suffice it to say that this year was a year of personal growth for me. I learned what I was, who I thought I was, and who I actually am. So, just because this personal epiphany occured to me in the middle of 2013, doesn't mean it wasn't a resolution in 2013. We're all trying to be better people in the next year, whether we say so or not. So my personal resolution for 2014 is to continue to be this new-found me, and stay positive for the entire year, not just when it starts and I'm hopeful.

But enough about the personal bit...let's get onto measurable goals for 2014. I've been dreading the long draw technique since I first attempted it three years ago. I probably should learn how to do it as well as I do the worsted draw method, since it's a great way to make a soft fluffy yarn with minimal effort. Part of the reason why I didn't feel like doing it was because I didn't have the fiber prepared in a way I felt comfortable using. All of my previous attempts I used hand carded rolags, and whenever I tried the folded-in-half version or strips from batts drafted from the side, I never got the fiber to draft smoothly into yarn.

My new blending board will help with this goal. I can make the rolags as thick or thin as I want, and I can make one giant rolag or several tiny ones. My first few attempts have been successful, though I've been mostly utilizing the worsted spinning method. Once I've played with the blending board enough, I'll be able to convince myself that there's nothing holding me back from using the long draw method. The 3 mini skeins on the left are the yarns I made from fiber carded on the blending board:


And to go along with my desire to become efficient at using the long draw method is to use fibers I'm scard of. Specifically cashmere. I have a whole pound of it, and two tiny spun samples. I encourage everyone else to just dig in and try stuff out (because you can't really destroy fiber, it just changes), so why not just follow my own advice? The truth is, I'm scared. I've been scared of this pound of cashmere since I bought it a year and a half ago. In 2014, it will be spun into a project. Maybe yarn for chic gloves. Or ear muffs. Guys, please hold me to this promise!

And my last resolution for 2014 is to learn how to use my new fiber tools effectively so I can teach you all the great ways you can use them. You all should know by now that I'm a teacher at heart, and I love sharing. This one will be loads of fun (and I'll probably accomplish this one first!) because I love testing stuff out, and putting it through the ringer, so to speak. Getting to know a tool is figuring out not just how to use it, but also knowing what it will and won't tolerate. What are its quirks? What's the best technique? That sort of thing.

My new fiber tools have come from Moonsong Fibers and are both handmade products. They were highly recommended from a fellow spinner/dyer, and since I'm all about empowering small businesses who make their own products, I couldn't resist adding them to my Christmas wishlist.


With that, let's bring in the new year with the promise of being new us-es and you-ses, and remembering to keep a positive outlook on the year the whole year long!

XOXO

Wednesday, December 25, 2013

Getting Over the Holidays: Void Filled

I posted recently that I was having trouble filling this holiday void. I couldn't put a finger on exactly what I was missing, just that I could feel it in my body. I sat down and had a chat with Mr. IT Guy about it, and we planned out what we will do to recreate that atmosphere. We baked some lovely dinner rolls, made lunch, and watched some Christmas movies. Later, we had a lovely duck dinner with all the fixins':


We slept in on Christmas morning, and had a wonderful day full of treats, stocking stuffers, and mimosas, all the while watching a marathon of Big Bang Theory season 2. I dragged out my lace knitting and went to town. This is everything we would have done in America, but now I know exactly what was missing: Family.

What a simple thing to overlook. I mean, living abroad means you'll get homesick from time to time, and it's healthy to acknowledge that you're feeling homesick. I think the reason I overlooked it last year was because I missed the homecooking and the vacation quite a lot.

So, now I know exactly why I was feeling depressed. I was missing family. Next year, I'll know how to cope with the depressed feeling at the holidays so things will be even better than this year.

I also wanted to thank those people who sent me emails and posted comments who tried helping me with my dilemma. It was a great help, and seriously gave me some things to think about. :)

Now that Christmas is 'over' (it's not really over until early January for me), I need to start thinking about resolutions. In years past, it was things like learning how to make socks, spinning on a wheel, or getting a business up and running. I certainly haven't learned all that I can, so there must be something I should set as a goal for 2014.

In addition, I plan to get back into my peak martial arts form and reduce more chemicals from my diet and topicals. Perhaps I'll make my own lotions this year. We'll see!

Sunday, December 22, 2013

Warp-Weighted Loom Update #2: Picking out the Wool

In my last post, I talked about finding some sources for warp-weighted looms. I talked about what archaeologists have managed to dig up, which isn't much, and I touched briefly on some of the problems associated with the technology of determining dyes/mordants/etc. used on prehistoric textiles. I also spent some time discussing how textiles can fit within a wider archaeological context, but because of their rarity, the field of textiles is vastly understudied. Enthusiastic spinners and weavers who wish to reproduce ancient textiles with similar tools and constraints contribute a great deal to the archaeological understanding of how these ancient textiles were made. 

So let's talk about the wool. That's tricky. Most of the professional articles I've read don't list specific wools, mainly because they can't isolate a specific breed. Even if they could, the types of wool that existed a thousand or more years ago just don't exist anymore. Wool has undergone evolution by the hands of their human companions, so the wool of today is often very different than the wool of 100 CE.

Let's take an example of a recent paper I read ("The development of animal husbandry from the Late Iron Age to the end of the Roman period: a case study from South-East Britain") about the intensification of animal husbandry. During the Romano-British period in England (roughly mid first century CE), Romans stationed in "barbaric" territory imported large quantities of goods, and among them, cattle. They were decidedly there for the long haul, so instead of importing beef all of the time, they were going to introduce their cattle (which had already undergone many generations of selective breeding) to the local cattle. In just a few generations, the size of each animial grew significantly.

Similar things were happening with sheep. There was a time when sheep shed their wool naturally, and had two (or more) distinct wool characteristics. There was an outer coat, typically made of coarse hair and kemp fibers, and an inner coat, typically soft and warm fibers. Both coats were shed, but at different times. If you saw a sheep molting their inner coat, you knew it was time to pluck the fine wool while avoiding the coarse hairs. Cashmere goatherds go through a similar process when removing the inner coat from the molting animal.

This inner coat on sheep used to be extremely fine, on the order of cashmere or angora. But with the increased demand for wool, harvesting requirements changed. Collecting wool from animals who might be shedding at different times is labor intensive as it must be done over a longer period of time. In the instance where several sheep are shedding simultaneously and there aren't enough hands to pluck wool, some of the shedded wool will be lost on shrubs, to the birds, and elsewhere. In addition, kemp/coarse hairs needed to be removed prior to processing, and only the inner coat was usable for most of their needs. This equated to a lot of labor for not a lot of reward. Environmental, social, and economic pressures may have lead to the changes we see in modern wool.

Selective breeding took over, and eventually animals were created which had a more uniform fleece (though not as soft as before) and continuous growth without molting. There are so few sheep these days which have a dual fleece of the same qualities that sheep had a thousand years ago, and scientists even argue that the so-called primitive sheep today are still not free of human tampering. Be that as it may, it does tell me that I'll have some trouble finding a fleece exactly like the fleeces available in the Iron Age. Thankfully, there are some papers available which have taken micron counts of fibers used in textiles and furs, so I can use that information to find a suitable substitute.

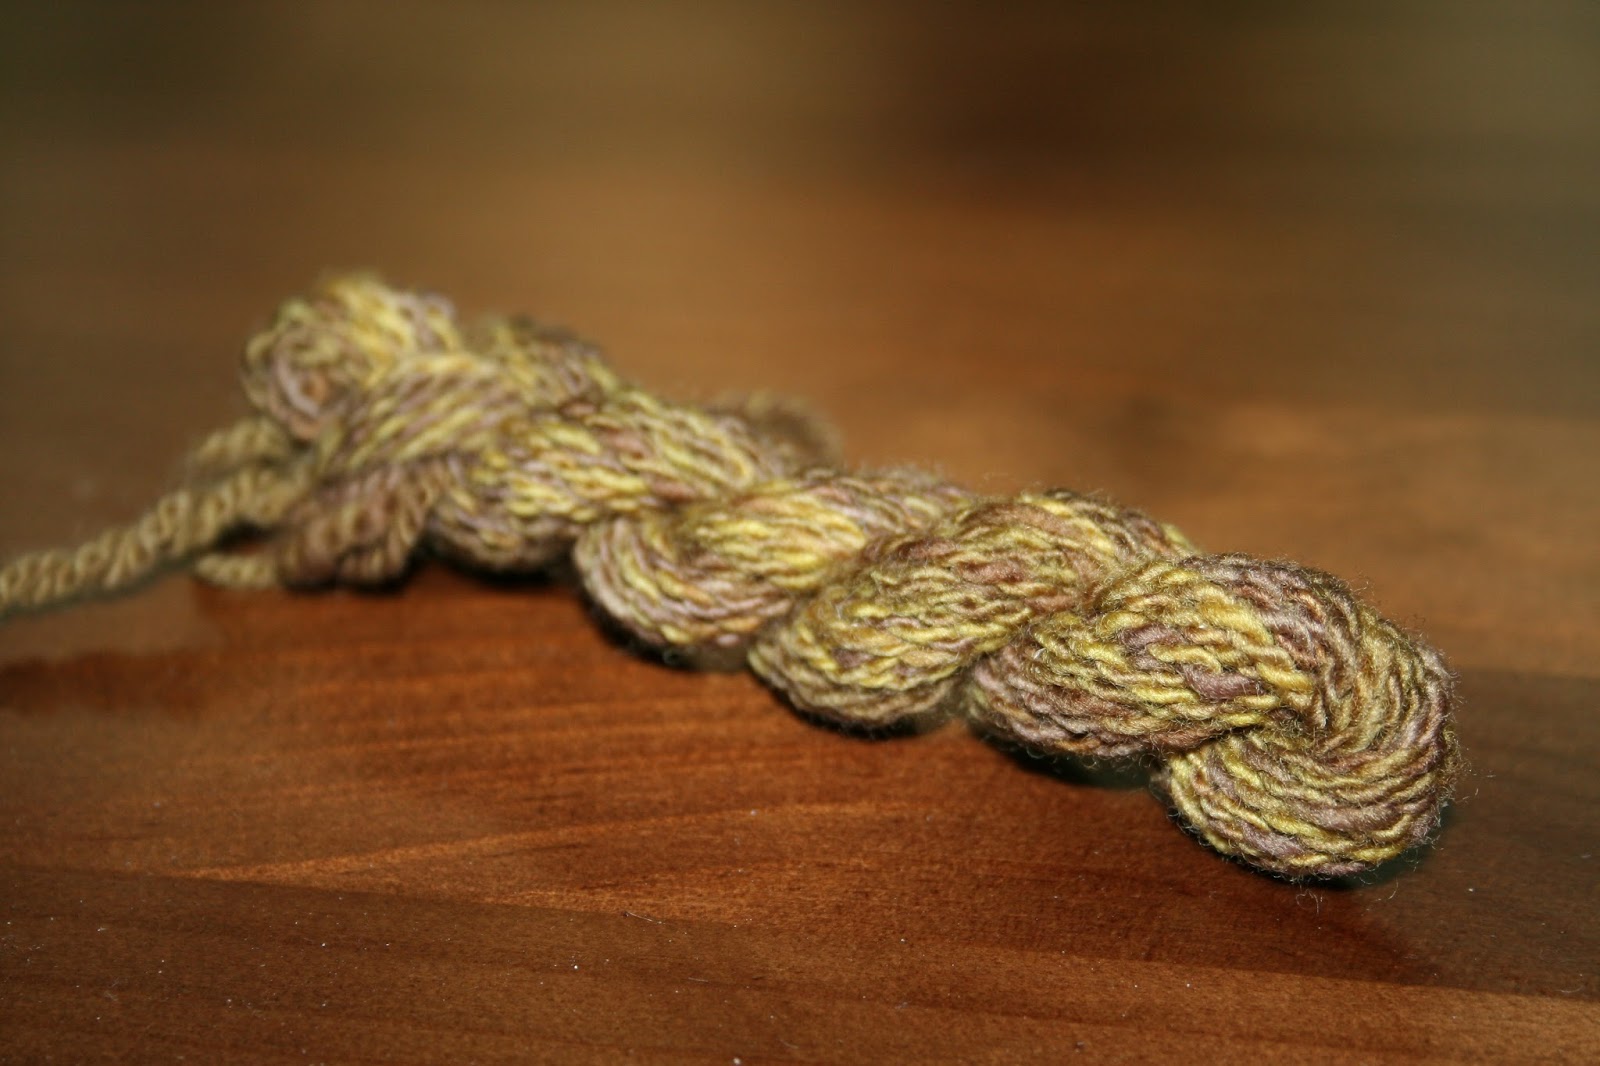
I've given some thought to my first warp-weighted loom project. I think I should stick with something simple, and something I'll use in the end. Samples are great, and I do a lot of sampling (Facebook fans know that I do a lot of sampling!), but to get a really good idea of what I'm doing and what I'm in for, I need to go all the way and make a completed item. I'm going to start off with a simple woven scarf out of a prime merino fleece I bought last year. You may call me crazy using such a soft fleece for this, but Iron Age people used fine fleeces for their textiles too. The majority of the fleece used was in the 15-25 micron range, so using a 21 micron merino fleece isn't completely nuts. :) For fun, I did a couple of samples, mixing the merino with alpaca and cashmere in 50/50 blends. First up, merino/alpaca:


This is a wonderful combination, but I'm concerned that the alpaca might weaken the strength of the yarn. I think I need to pay more attention to the crimp and twist of my fleece and yarn, so although this is wonderfully soft (and I love the heathered gray), it probably won't be practical for this project. Nevertheless, it's on the backburner and might become some wonderful socks one day (I do have 6 pounds of this fleece, afterall).

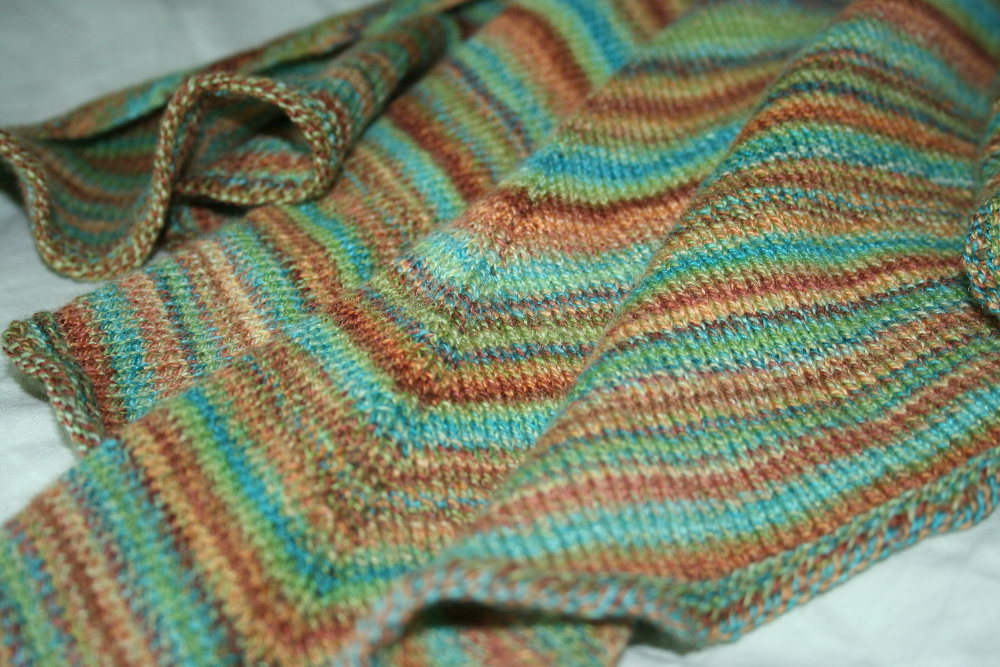
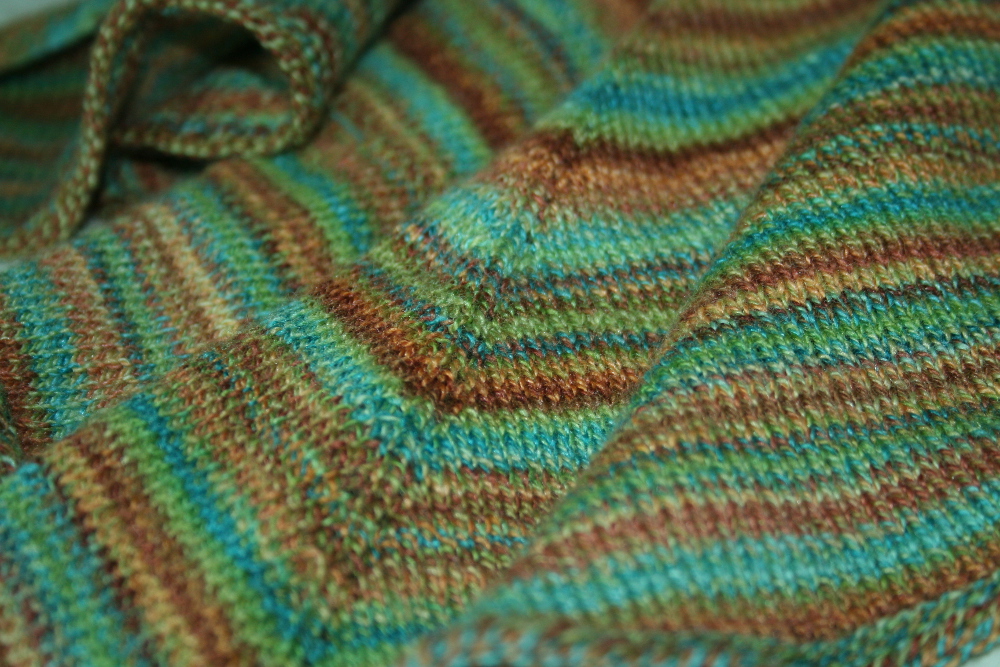
This one is decidedly for fun. Here is the merino/cashmere blend:


I was thinking that cashmere might add some extra fineness that was present in fleeces used for Iron Age textiles, but I'm not convinced it's the right type of fineness. It does have crimp, but is it enough to get a strong yarn? I might just hang onto the cashmere and make a knitted lace scarf for the dead of winter which I think is coming, but never comes.

In the next update, I'll talk briefly about what I mean when I say 'Iron Age,' since it matters where I'm talking about geographically. For this project, I am trying to get a general sense of 'Iron Age' technology and materials, so I may be combining information gleaned from Iron Age periods across the UK and the surrounding areas. I've also updated the bibliography, just in case others have a copy elsewhere.

Current Bibliography:
Albarella, U., Johnstone, C., & Vickers, K. (2008). The development of animal husbandry from the Late Iron Age to the end of the Roman period: a case study from South-East Britain. Journal of Archaeological Science, 35(7), 1828-1848.
Andresen, S. T., & Karg, S. (2011). Retting pits for textile fibre plants at Danish prehistoric sites dated between 800 bc and ad 1050. Vegetation history and archaeobotany, 20(6), 517-526.
Degano, I., Ribechini, E., Modugno, F., & Colombini, M. P. (2009). Analytical methods for the characterization of organic dyes in artworks and in historical textiles. Applied Spectroscopy Reviews, 44(5), 363-410.
Joosten, I., van Bommel, M. R., Hofmann-de Keijzer, R., & Reschreiter, H. (2006). Micro analysis on Hallstatt textiles: colour and condition. Microchimica Acta, 155(1-2), 169-174.
Rast-Eicher, A., & Bender Jørgensen, L. (2012). Sheep wool in Bronze Age and Iron Age Europe. Journal of Archaeological Science.
Ryder, M. L. (1987). The evolution of the fleece. Scientific American, 256(1), 112-119.
Strand, E. A., Frei, K. M., Gleba, M., Mannering, U., Nosch, M. L., & Skals, I. (2010). Old Textiles—New Possibilities. European journal of archaeology, 13(2), 149-173.
Vanden Berghe, I., Gleba, M., & Mannering, U. (2009). Towards the identification of dyestuffs in Early Iron Age Scandinavian peat bog textiles. Journal of Archaeological Science, 36(9), 1910-1921.
Viklund, K. (2011). Flax in Sweden: the archaeobotanical, archaeological and historical evidence. Vegetation history and archaeobotany, 20(6), 509-515.

Wednesday, December 18, 2013

Video Tutorial: How to Spin Yarn with a Drop Spindle

I bet you’re here because you want to learn how to spin. A while back, I turned to youtube to find videos about spinning with a drop spindle. I was pressed for time because I only had 6 months to research, experiment, and write my dissertation, and frankly, the internet was failing me. I’ll explain more about why I needed to learn how to spin below, so you can read that if you’re interested.

This is a 3-part tutorial video series on learning how to spin wool with a drop spindle. The first video talks about the wool itself. It covers the most basic wool preparations that you’ll see in the market, but is by no means exhaustive. You can spin locks with minimal fluffing (this is a common technique if you want to add lots of texture to your handspun), and you can spin locks that have only been picked open. Rolags are part of a hot new wave of fiber prep that I’ve seen on Etsy, so it’s likely that you’ll see those more commonly around the webs now too. There are probably dozens of more preparations that I’m not covering here, but that just means they’re more rare. If you have any questions about that, post in the comments below.

Video 1:


In video two, we get into spindle basics. This includes describing the anatomy of a spindle and how to get started with attaching the wool to the spindle. There are also various types of spindles available out there (mostly top whorl or bottom whorl spindles), and a plethora of ways to attach the wool to your spindle, with or without a leader yarn. Someday, I’ll add more supplemental info in video form for those visual learners out there (like me!).

Video 2:


The last video talks about joining in a new piece of fiber (remember, it’s not necessarily a continuous piece!), as well as offering help to anyone who needs help with troubleshooting problems. The door is always open, so ask all of the questions you want!

Video 3:


For those of you who don’t already know, I got into spinning through a convoluted path. I wanted to get my master’s degree in science rather than art, and to do that, I needed to take the path of experimentation. I combined my volunteer work at Krannert Art Museum in my college town with my desire to know more about textiles to create a research topic that would be relevant to an MS in Museum Studies. I thoroughly enjoyed the topics discussed in the conservation unit that I took, so I began structuring my project goals around the effects of light on archaeological textiles.

But there was a catch. Since I was a grad student at the University of Leicester in their distance learning program, I didn’t have anything other than a school affiliation (ie, I had credentials, but no funding). I couldn’t secure actual samples for my research, so I needed to learn how to make them. This aspect had me thoroughly giddy, and I couldn’t wait to start spinning. In the month I had to write my project proposal, I spent plenty of time combing the internet for videos about spinning. I’m a visual learner, so I really needed video help rather than blog help. There wasn’t much there that I found helpful.

I didn’t have much time to get my samples ready, as I needed time to conduct my experiments and interpret results. And then there was the daunting task, actually writing it all up. From start to finish, I only had six months to do everything. Luckily, the town I lived in had a spinner’s guild, so I sought instruction from a master spinner. I learned how to process, spin, and dye wool in a weekend--an exhausting weekend (enthusiastic beginners should know what I’m talking about). In the end, I was able to make my surrogate archaeological samples, experiment with them, and get good results. But I never forgot how frustrated I was with the lack of (free) information about spinning on the internet.

And that brings us to the inspiration of the video series. I really like teaching and explaining things, and I really love sharing. I wanted to give back to the handmade community, so I created videos to help fill the void. I hope you enjoy them. Many others have found them to be useful, so I hope you do too. If you ever have suggestions for future videos, post in the comments below. I listen to every suggestion I get, even if it does take me a few weeks to get the video made.

Thursday, December 12, 2013

This Will be Sock Yarn, Even if it Kills Me

Well, maybe I won't go that far. But it will be sock yarn in the end. One way or another. I shall have socks! Huff, huff.


I bought the Unofficial Harry Potter Knits magazine over the summer while following my MIL around the sewing shop. I don't usually like to buy books/magazines full of patterns unless I seriously want to make at least 50% of the projects. In this magazine, there's probably around 75%.

Normally, I'm pretty free of constraints when it comes to making yarn. I don't usually try to make the yarn fit a specific gauge. I have my stash of handspun and when I feel like making something from a pattern, I look to see if I have anything that fits the requirements. About a third of the time, I find the right pattern/handspun yarn combo.

But what about that remaining two-thirds? I have a ton of projects I want to work on and a ton of handspun I want to make. It looks like I need to start swatching for projects so I can get more projects done with my own yarn, without making my handspun yarn stash massive. I'm not a huge fan of swatching, but I realize its importance. So now begins the testing.


The first round of testing turned out to be fruitful. I learned that the gauge I needed was different than the gauge used, so now I need to spin it at a thinner gauge. I'm still not quite happy about my gauge problem though, but a discussion of WPI is to be set aside for now. Sampling is great so I don't waste my wool (it's not really wasted, but it does mean using it for something else). I really want to make the Dragon's Egg socks. It'll happen. I just need to make another sample.


I'll be back with an update once I get the other round of testing started!

Tuesday, December 10, 2013

The Holiday Void: It's Just Not the Same

Funny enough, it's that time of the year again. This year is turning out to be a bit better than last year, but it's still not the same. Being able to cook in a larger kitchen and bake things like cookies are my saving graces. Not having to work on Christmas is another big perk this year.


I can't put a finger on it, but it I don't feel completely engulfed by the Christmas spirit here. Sure, I sing carol songs to myself, watch holiday movies, and decorate--but there remains a small void. Is it family? Friends? Commercialism?

Our friends that we met up with in Germany during the summer are going to Holiday Markets in their sleepy little suburb (Solingen) this month. Do I miss the shopping? The smell? The crafting? The atmosphere? A full year later, and I still can't pinpoint why I feel the way I do about this holiday here. Either way, I wanted to re-share this original post I made last year concerning Christmas in Korea.

Our Thanksgiving turned out nicely, as you can see from the following photo. I'm not sure what my problem is, since I can clearly have a great time during a major holiday. I'm not looking for a psychoanalysis, just something to help me identify what it is that I'm missing so that I can cope with this feeling no matter where I live in the world. Given the life of a linguist (Mr. IT Guy) and archaeologist (me), living abroad is highly likely.


Originally posted on December 12, 2012:

It’s Christmas time in South Korea. And for a foreigner living here, it’s not quite like it is back home in the States. For one, there isn’t as large of a religious population here that would celebrate Christmas. It also isn’t a huge secular holiday here either. That said, you can see some inkling of the holiday, but it isn’t brought out with the sparkles and glitter like it is in the US. I’ll note some differences below, but keep in mind that this is just an observation of the differences, and I will never make a claim that one culture is better than another. (I have to put that disclaimer in there because I know someone will say I’m racist—hardly).

So, while people back home were getting ready to plan their Thanksgiving dinner preparations, Starbucks in Korea threw up their Christmas decorations on November 1. Since Thanksgiving is obviously an American tradition (though other countries have similar feast celebrations), some parts of Korea wasted no time shoving us all into the holiday spirit. American-style businesses (like Starbucks) had their halls bedecked with ornaments and garland just as Halloween concluded. Korea-based businesses (which are most of the businesses in Korea) have almost entirely skipped the decorations for Christmas. When I head into restaurants, I will occasionally see a tiny tree or a string of lights. As far as the streets are concerned, you would swear it was mid-January as they are barren of holiday spirit.

Trying to find holiday decorations has proved rather difficult for me. Costco has trees, lights, garland swags, and ornaments. If you have a membership, you will find it easy to get a full-sized tree and decorate it like you want. However, since it’s unclear how long we will stay here (a minimum of one year, but we could potentially stay longer), I didn’t want to buy a huge tree and decorations, and then have to unload it to another foreigner before we have to scoot. Also, where can you store a six foot tree in an apartment that’s only 179 square feet? (Yeah, and there’s two people living in that apartment—thank goodness I love my husband!) I managed to find some modestly-sized decorations at Daiso (like Dollar General), a Japanese company that also has stores in Korea. I bought a small 1.5 foot tree, tiny red and green ornaments (yes, with glitter!), and a sting of thin garland. It took me five minutes to decorate, but already my holiday decoration bug has been sated..well, for now at least.

Because finding holiday stuff here has been difficult, I think it might be a fruitless search to find our yearly special ornament. Every year since 2007, we have bought an ornament that encapsulates the year. You know, something which had meaning, and would easily remind us of what happened that year. I’m thinking that we might have to settle for a homemade ornament this year, since I doubt we’ll be able to find a good ornament here that has Korea on it or something. Maybe I’ll make a needle-felted flag or something. Maybe I gave up too soon. You can always find exactly what you’re looking for if you look for it long enough.

Okay, so you can’t talk about the holidays without talking about snow. Korea is a peninsula, so the air here contains more moisture than in Illinois during the winter. I was super thrilled when the weather finally got cold enough to make snow. However, I forgot that many of the walking surfaces here are made of granite instead of concrete.

Let me rewind here. During the monsoon season in Korea (roughly July through mid-August), it rained a ton. Like, everyday it rained. And the humidity was through the roof. It was so humid I couldn’t keep bouncy curls because they were limp from the moisture. Also, wet granite is like a slip-n-slide. Add in the fact that I’m super clumsy, and you get disaster. I was an accident waiting to happen the moment I walked outside and it was raining. Okay, now snow and ice are worse than water. Granite + snow = I fall down. I was carefully walking up some snow-covered granite stairs (and there was no railing either) and then, boom! I trip and cover my face, hair, mittens, and stairs with a medium sized coffee (which costs a fortune--$4 on a black coffee). I got a big ol’ bruise on my knee and forearm—both bruises are still there, the one on my knee is still a lovely green and purple color—and someone asking me if I’m okay. Really? I just fell up some stairs and smeared coffee on myself..and my knee is killing me.

Sigh. I’m just aggravated because granite looks lovely, but in a rainy country, it provides hazardous conditions. Rant over. I just wanted to point out how silly I thought it was that there is granite all over the walking surfaces here. I haven't been having a very good time here during the holidays. Things are sure to improve, right?

Wednesday, December 4, 2013

Tutorial: Spinning One Colorway and Making Different Yarns

When I first started dyeing wool, my friends expressed interest in trying out "spinning." They ultimately didn't stick with it, but they gave it several tries. One question that came up was, "How will it look all spun up?" It's kind of difficult to explain, so I decided to come up with this tutorial for showing how you can prepare, spin, and ply (or not ply) a colorway to get different color effects. I've cleaned up the wording a little so it isn't as verbose as the original. Let me know how useful this was for you!

Originally posted on July 17, 2011:

Here's a tutorial on ways to spin one specific hand dyed colorway. Jealousy is one of my best selling colors, and you'll see from the following pictures why! This particular braid didn't sit in the mordant bath long enough, so it didn't take the dye like it normally would. It's still colorfast, but it isn't the colorway it's supposed to be, and since it couldn't be sold, I turned it into this tutorial.

A quick note about terminology:
  1. Combed top: a fiber preparation whereby the fibers are combed into one direction, removing the short fibers and aligning the fibers horizontally. This method will produce a very dense, compact tube of fiber, especially when produced commercially.
  2. Worsted spinning: a method of spinning where the fibers lie parallel to each other, and when spun, produce a smooth, strong yarn.
  3. WPI: wraps per inch. A method of measuring to determine the gauge of a yarn. To measure, wrap the yarn around a ruler over a 1 inch distance. Without letting the wraps be too close or too far apart, count the wraps and this will determine the gauge of the yarn.
Here is the picture of Jealousy in its braid:


I split it into 4 roughly equal pieces. I did this by unbraiding the fiber and splitting it down the middle for the whole length of the fiber. Then, I took each half and split it one more time, resulting in each piece weighing approximately 30 grams (28.6 grams = 1 ounce).


The first bundle I split one more time (each piece was 1/8 of the original fiber), and spun into a worsted weight 2-ply. In order to make a specific weight of yarn which contains 2 plies, you need to spin the singles at half the finished gauge. That way, when you ply the singles together, you arrive at the needed gauge. I needed a 10 wpi for the finished yarn, so the singles that I spun for this yarn where at 20 wpi. After I made the singles, I wound it onto a ball winder which made a center-pull ball. I took the inside end and plied it with the outside end, thereby making a 2-ply from the same ball of yarn. This method of plying ensures that you don't waste any handspun, but it will cut your initial yardage approximately in half. There were 57 yards after plying.


For a better view of the color:


The second bundle turned into a bulky single. I spun it as it was, without further splitting or manipulation--I let the colorway dictate the finished yarn. This yarn turned out more thick-and-thin, so some places were more of a worsted weight than others. If you're spinning a single as the finished yarn, you need to take care to not over-spin it, since your knitting will buckle and bias in order to balance the extra active twist. Plying will balance the twist in a yarn, but in a single, you'll need just enough twist to hold the yarn together without it falling apart. The resulting yarn was 34.5 yards.


This next picture of the second sample really demonstrates the kind of twist you need for a well made single yarn. When you hold the yarn taught and then release a little, it should kink up on itself, as you can clearly see here. This is what the yarn should look like prior to washing and setting the yarn.


I split the third bundle an additional time, just as I did for the first bundle. I made a bulky 3-ply Navajo-plying my single. Essentially, you take one piece of yarn and make 3 pieces by making a large slip knot after slip knot, just like making a crochet chain. This method of plying lets you do two things: 1) you can ply the pieces together while keeping the color changes together; and 2) you'll waste almost no yarn. Like the center-pull ball method, you'll reduce your initial yardage by two-thirds. Because I wanted 3 plies, I multiplied the finished wpi that I wanted (6 wpi finished) by 3 and spun a single that was 18 wpi. I ended up with 24 yards in the finished skein.


I think that Navajo-plying is one of my favorite plying techniques so far:


For my last bundle, I made a gradient yarn. I love the look of gradient knitting, but not always a fan of the gradients in commercially produced yarn. This one was by far the most complicated yarn I made in this series. First, I split the fiber once more (like in bundle 1 and 3), then I pulled apart all of the green, dark green, and dark gray pieces for each strip and made a pile for each. This was going to be a 2-ply DK weight yarn that was to be spun and plied from two different bobbins. I started by spinning the greens and then transitioned to dark green and finally dark gray. I did my best to let the colors transition into each other as they might if it had been dyed that way. I had two bobbins that had approximately the same yardage on each. I plied them together with corresponding colors together, but because of human error, the colors didn't match up exactly. I could have plied the gradient as a Navajo-ply to have more consistency with the color changes, but I wanted to show you how it could look if you chose to spin them separately. The final yarn had 76 yards.


This picture shows a bit better how the gradient looks when it isn't twisted into a hank:


When I was all finished, I made knitted swatches of each skein. Here is yarn number 1:


I cast on 30 stitches on size 7 needles with 5 stitches per inch. A close-up:


Number 2 (it biased a little ^^):


This one makes a very nice self-striping yarn. This was 20 stitches cast on with size 10 needles, at 3.2 stitches per inch. Close-up:


Number 3:


You can see that this one has smaller stripes than the one above. There were 3.5 stitches per inch, and I cast on 20 stitches:


Number 4:


It's obvious in this sample how off the colors can get if you do this method over the Navajo-plying. Each way has its place though. This was 5.5 stitches per inch with size 5 needles and 40 cast on stitches:


I hope you found this tutorial useful/interesting. Thanks to everyone who patiently waited for this post. :)

Wednesday, November 27, 2013

Winner of the Being Thankful Handspun Yarn Giveaway Announced!

First, thank you to EVERYONE who participated in this challenge. I hope you had fun with the Mini-Challenges I hosted on facebook, and it really gave me a nice window into your lives. :) I also hope you took this opportunity to see what really matters to you and the people around you, and to get a bigger picture of the world around you. It's easy to fall into a rut where you think things couldn't possibly get more unfair. These last two weeks have really made me think more positively about what I do have, and to look for the silver lining in everything.

I have chosen the winner via random number generator to keep things fair. Here is the screenshot of the winning number and the winning name:


It's you, Heather! :) I'll get in touch with you about shipping shortly. For everyone else, here's a major consolation prize. From now until December 31, 2013, use the coupon code STOCKINGSTUFFER10 at Etsy checkout and get 10% off your entire order. Also, because this giveaway was a great success, I'm offering a free domestic shipping coupon on your next order (you'll get the free shipping code after you make your purchase)! And since I can't possibly forget about my overseas friends, I'll give you 50% off your shipping costs if you make a purchase from now until December 31, 2013. I'll do this manually since Etsy doesn't offer shipping discounts like this.

So, let's all sit down and enjoy our family's company while we eat, drink, and be merry. Happy Thanksgiving everyone! <3

Tuesday, November 26, 2013

Free Cora Shawl Knitting Pattern

Here is my first free pattern I posted on my blog and ravelry.

First posted on March 8, 2013:

First, a bit of an update. They’re on their way! What are? The batts, of course! Now, you’ll remember that I can’t dye in Korea, so I’ve been focusing on making batts for the last few months. I sent off the box to America a few days ago, so they’ll be available for sale this weekend..hopefully. :) I will be posting special offers only available to my Facebook and Twitter followers. So...go there and collect on the deals!

Also, I’ve had a lot more time lately to develop new patterns for handspun yarn (or commercial and artisan dyed yarns). I’ve been posting a lot of sneak peek photos to FB. The first one I'm posting is a FREE shawl pattern. I call it Cora, and here's an excerpt from the pattern:

"Cora is a story of an enduring shawl. She was built to keep a neck warm, and her elegance is expressed in the clarity of the design. With functionality in mind, Cora conveys a gratitude to the simplicity of our pre-internet days."


Well spoken, no? I was truly inspired to make it, so I hope you will be too. If you make the shawl, be sure to send me some photos. I'd love to make a shawl gallery for the website. :)

Here's the pattern link: Download Cora Shawl Pattern


Wednesday, November 20, 2013

Warp-Weighted Loom Update #1: Finding the Sources

I'm not going for accuracy here, I just want to get a really good idea of what I'm doing with this warp weighted loom project. But it's good to talk briefly about the sources. I've read other blogs which have attempted such projects (though, they were going for more than just accuracy since most of them already have mad weaving skills), and they post their progress just like I'm about to do. However, most of the time at least, they list no sources for their information. No, I'm not the bibliography police--I'm just curious which sources they used so that I can use them. No need to reinvent the wheel here.

So that got me thinking: Why don't I list a bibliography here so others can find out about the information I used? And further, I can offer my reasoning for using/not using certain sources (probably in a future update when I have a good working bibliography). Plus, it'll keep me on track. And motivated. It isn't hyper critical for me to get everything "right" on the first try, but it's good to start out with a basic idea.

First, let's talk about the archaeological record. Finding well-preserved textiles which can tell us something about the craft, decoration, use, dye, and components (like wool/plant/metallic/etc.) are rare, so when they are found, papers are written about them. The biggest problem facing archaeologists who want to study ancient textiles (besides the problem of rarity) is the context. To determine the context, you often need to destroy the artifact. Great, but what do I mean by "context?"

In simple terms, I'm talking about all of the other stuff you can determine by examining something. For example, if you look at the dyes used on a textile from a specific site, the dye can tell you something about the dyeing technology, importation of dyes (or dyed items), and regional use of certain dyestuffs. If you're looking at a textile which has been dyed with dyestuffs found locally and in abundance, the archaeologists can make inferences about that site. The archaeologist can use this information to begin forming the context of a site, usually with the help of other types of artifacts and features (features are things like walls and houses). Let's say that there is just one family-sized house and adult sheep bones found in refuse pits to add to our example.

Given this information, the archaeologist begins to paint a picture of a small farmstead where people were raising sheep for subsistence (ie, just enough to support a family with very little surplus possibilities) and using the local flora to add flair to their textiles. This is essential for archaeologists to get a rounded view of the people who lived here before, and to prevent contextual biases like those frequently made in the 19th century. Unfortunately, in order to do this, archaeologists often need to destroy the textile to extract the information needed.

There are some ways to determine dyestuffs and fiber type without destroying the artifact, that's true, but the accuracy decreases and it won't account for surface changes (ie, the presence of dirt, abrasions, etc.). During the experimentation process of my master's dissertation, I used visible spectrophotometry to determine absorption curves of one dyestuff (cochineal) with various mordants (the substance that binds the dye to the fiber). The point of that sentence is to tell you that even though I used only one type of dyestuff, the absorption curves were different given different mordants. Thus, this isn't a reliable method for determining dyestuffs.

Destructive methods are generally employed to determine the exact (or nearly so) dye used, and possibly its origin (in the case of several species within the same genera), to understand how people led their lives in prehistory. This discussion of dyes is just one aspect that archaeologists investigate, and it isn't the only investigation which requires destruction of the sample to obtain vital information.

So let's bring this all together. Textiles are rare. Archaeologists tend to preserve as much of the artifact as possible for future study (and conservation) while doing their research. The study of ancient textiles is often destructive, which leads to textile research being understudied. As a result, not much information exists about textiles in specific regions/time periods. In the end, archaeologists don't use textile information regularly to help determine context of archaeological sites. Textile research may not be crucial for understanding and interpreting most archaeological sites, but it adds a dimension to the daily lives of these people we don't know much about, and finally, isn't it all about rebuilding a picture of the past through excavation?

Okay, don't get ahead of yourself; here's what I'll do. What I am able to find I will document here on this blog. The articles and websites I list will be pertinent to hobby weavers, spinners, and dyers, and extremely useful for those out there who are like me in wanting to reproduce archaically woven textiles.

Also, I'm sorry I wasn't so brief. There's a lot to say about this project. In the next update, I'll continue on with finding sources for wool and loom building (and I'll definitely post more pictures). Thanks for reading!

Current Bibliography:

Andresen, S. T., & Karg, S. (2011). Retting pits for textile fibre plants at Danish prehistoric sites dated between 800 bc and ad 1050. Vegetation history and archaeobotany, 20(6), 517-526.

Joosten, I., van Bommel, M. R., Hofmann-de Keijzer, R., & Reschreiter, H. (2006). Micro analysis on Hallstatt textiles: colour and condition. Microchimica Acta, 155(1-2), 169-174.

Rast-Eicher, A., & Bender Jørgensen, L. (2012). Sheep wool in Bronze Age and Iron Age Europe. Journal of Archaeological Science.

Ryder, M. L. (1987). The evolution of the fleece. Scientific American, 256(1), 112-119.

Strand, E. A., Frei, K. M., Gleba, M., Mannering, U., Nosch, M. L., & Skals, I. (2010). Old Textiles—New Possibilities. European journal of archaeology, 13(2), 149-173.

Vanden Berghe, I., Gleba, M., & Mannering, U. (2009). Towards the identification of dyestuffs in Early Iron Age Scandinavian peat bog textiles. Journal of Archaeological Science, 36(9), 1910-1921.

Monday, November 18, 2013

Photo Tutorial: How to make a M1 Knitted Increase

Here is a "make 1" photo tutorial that I posted on my old blog in 2011. Before I learned how to do this, I only knew one way to make an increase, kfb (knit into the front leg of the stitch, then without slipping, knit into the back leg of the stitch). I have found this particular increase to be _extremely_ good at making a hidden increase. I've used it mostly in making skirts, since I don't want large openings or strange bar stitches on my hips. But, it's a useful increase to know about for many other types of projects (sweaters, mittens, etc.) and gives you a great alternative to the kfb increase stitch. Further, depending on if you do a M1L or M1R, the slant of the stitch will look more gradual than an kfb stitch.

Original Post from March 8, 2011:

When I first started knitting in 2006, I had one goal: finish a scarf. I attempted to learn to knit from a book, but a friend of mine, Christine, pointed out that I was doing it wrong. Once corrected, that scarf took no time to finish.

After finishing my first project, I just had to start knitting other things. I made a couple of hats, made a scarf for my husband, but I felt like I wanted to do more. Christine pointed me to the local yarn shop, and it took no time to get hooked on Malabrigo and merino.

Then started Knitter's ADD. Suddenly, a whole new realm of fabulous fibers were exposed to me. I bought alpaca, mohair, and more merino. To increase my knitting knowledge, I started working on harder patterns. I also learned how important it is to make a gauge swatch! Much of my earlier work was too small for me, so I sent it along. If I really wanted to keep the yarn, I would re-knit the item, or choose a different pattern. Eventually, I had multiple knitting projects going and, for some, no finish date in sight.

I've read on places like Ravelry, that many knitters have several works in progress (WIPs). I like to have an easy project (something that doesn't require me to keep track of stitches or rows), a medium project (my current knitting level), and a harder project (introduces new stitches, patterns, shaping, etc.). This keeps my sanity.

My New Year's Resolution for 2011 was to learn how to knit socks, something I had been avoiding for a few years. I made my first sock by the end of January 1st. I can see how they might be addictive, but a pain if you knit one sock at a time. I have several more months this year to learn 2 socks at a time, so I'll keep you posted on that development.

So, what have I been up to lately? I'm revisiting some yarn that I had knitted into a partial dress, but soon realized that the yarn isn't meant for that pattern (when a pattern calls for wool yarn, don't use cotton yarn--it doesn't have the same kind of stretch). I'm knitting a skirt with 100% cotton. I'm confident that this will be a finished project that I'll actually wear. Here are a couple of pictures of the pattern:


I'll also show you how to do a M1 increase, with photos. I've done the KFB (knit front back) to increase, but the M1 is a little different. If you knit through the front of the knit stitch, and, without slipping the stitch off the needle, knit through the back of the same stitch, you will have made a KFB increase. It takes one stitch and makes two. The M1 increase is a little different. Below is a photo-tutorial of the M1 stitch:


The M1 stitch is very easy to make. In between stitches, there is a "bar," as can be seen in the above picture. Pick up the bar with the tip of the right hand needle from the front side of the work. Place the bar on the left needle purlwise. The bar should rest on the needle, as you can see in the picture below.


In the following picture, you just knit the bar as if it were a normal knit stitch. It will feel a bit awkward and a bit tight, but that will be normal.


If I pull the stitches like I do in the picture below, you can see how the stitch looks when it's just been made.


I'm a huge fan of this increase, since it leaves no discernible hole like you would have with a yarn over increase. There is only a subtle trace of the increase, unlike the look of a KFB stitch. The last picture is a close-up of how the M1 stitch looks in a knitted garment.


In another post, I'll revisit this project since it involves a fishtail lace pattern. The lace is knit separate and grafted onto the base of the skirt (the part I'm making right now) by using the kitchner stitch.

Monday, November 11, 2013

Being Thankful: Handspun Yarn Giveaway!

You guys are great. No really. Absolutely fantastic. When I'm sitting here thinking of what to make a video about, you're there. When I'm indecisive about a new project, you're there. When I've made something pretty and I can't find anyone around to appreciate it, you're there. So, thank you for always being there for me.

Big businesses often forget what got them there. It's the people buying the product and being loyal. It's about filling a need. It's the business listening to what the people want and giving it to them. But they sometimes lose sight of that when they get too big for their britches and scale-up. That's one of the best reasons to shop at small businesses. That's why I love being a small business. I listen to what you say, give you the product you want, and make changes that brings all aspects of entrepreneurship into balance. In return, you share your ideas, your projects, and your unending enthusiasm. Without further adieu, here are the details of the give away. First, the yarn!


This novelty handspun is made of mostly merino wool, with teeswater locks, bamboo, firestar, angelina, and tussah silk, and it has been plied with a heavy cotton thread and various colored sequins.


There's a color gradient that goes from a desaturated green to a chocolatey burnt sienna brown. The total weight of the skein is 113g, with about 130 yards total.


Here are the details of how to enter to win. There are numerous ways to get your name into the hat for the drawing.
  1. Follow my blog! (Post in the comments below)
  2. Follow me on Twitter! (Tweet at me so I know to give you an entry)
  3. Like my Facebook page! (Post on my page so I can give you another entry!)
Those will give you one entry each. How else can you get an entry ticket? Well, I'll be posting mini-challenges on Facebook from now until November 27, 2013, and if you contribute, I'll give you another entry. On November 27 at 5pm CDT, I'll tally up the entries and pick a random winner via random number generator. The winner will be announced on Thursday, November 28. I have a secret for those who didn't win the giveaway, but I'll not spoil the prize before then. :) Just keep watching the facebook page for more info.


I can't thank you enough. You're the best support structure I could ask for, and I'm glad you spend a few moments every day reading my posts on Facebook, here, and watching my videos on Youtube.

Friday, November 8, 2013

Starting a Big Project: Warp-Weighted Loom Weaving

I normally shy away from large-scale projects because I lose sight of the end as life and other stuff piles up. Scarves, mittens, socks, etc., these are my kind of projects. And nothing overly complicated either. I would love to make a sweater that fits me. Or a lovely lace shawl. But then reality hits me and I know that I don’t have the time or brain capacity to begin a project like this.

However, that shouldn't be a good excuse. If I blamed a busy life on why I can’t do X or Y, I wouldn't get to enjoy all of the cool things in life. To keep me on track and not straying from my goal, I've decided to post my progress regularly here. It might not be a weekly update, but I’ll try to do it once a month at the very least. In this endeavor, I’m a beginner, as I know next to nothing about weaving or loom building.

Okay, so why did I pick _this_ type of loom? I have archaeological training, and I’m planning to head back to school for an MA/PhD in archaeology soon (I've been accepted to the school, I’m just scrounging up spare change to pay for it). For a long time, I have believed that you need to have a job which you love doing, and if your hobbies can transcend that line, your job can be all the better for it. I love seeing how things are connected together, and I have quite a few personal interests. I’m planning to get a PhD in landscape archaeology, and I’d like to add the skills an experimental archaeologist might have. As an ultimate goal, I want to see how textiles might have played into choosing various landscapes in the prehistoric past, or if textile production helped shape the land somehow.

I’m looking to specialize in the landscapes of Iron Age Britain. Most archaeologists have secondary or tertiary skills which aid their research and interpretation, and I would like to call upon my training in museum studies and experimental textile production. I’m not reinventing the wheel here, but with my unique background, I’m hoping to cross boundaries that are rarely crossed. And I’m bringing you all with me. Doesn't that sound like fun? :) More updates to come!

Tuesday, November 5, 2013

Photo Tutorial: Adventures in Drum Carding

This is an old tutorial post that I created to help others learn how to use a drum carder. This information was tough to find all in one place, since I have a love/hate relationship with the forums on ravelry. What you're seeing here is the fruitful labor of combining the information from several sources into one, while also adding personal insight from a beginner. Since writing this particular tutorial back in March of 2011, I've become a drum carding connoisseur and made several drum carder tutorials on youtube. To keep the content of this post reasonable and focused, I'm going to just repost the photo tutorial here (with a bit of fine tuning).

Original Post from March 15, 2011:

I am currently renting a drum carder from my local guild. Prior to using one, I watched a bunch of videos on youtube, but there are few "drum carding tutorials." The drum carder I rented is a Pat Green, but since it's kind of old, no one remembers which model it is. I've found several similar models on their website.

There are some basic things to know about drum carders before you get started.
  1. Never try to add too much fiber all at once. It will bend the metal tines and break the fibers, resulting in a major expense to replace the carding cloth and batts which have many weak, broken fibers.
  2. Never try to add more fiber than the drum carder can hold. You might receive specs from the company regarding your specific drum carder, or if you're borrowing one, be sure to slowly add on more fiber until it looks full.
  3. If yours has a handcrank, be sure to turn it slowly. If you try to card the fibers quickly, it may result in broken fibers and a batt full of nepps.
  4. Unless your drum carder specs say otherwise, I suggest that the longest staple length that should be carded is 6 inches. Longer fibers will wrap around the drum, making it difficult to successfully lift the batt from the drum.
Now, on to the pictures! I've been carding for a couple of months, but I am by no means an expert, nor do I know everything there is to know about the various ways you can apply fiber and color to a drum carder. First, I'll show you a few tools that I use to make a hand-pulled roving from a drum carder.

This is a diz that I cut out of cardboard. It doesn't have to be round, so I made it more complicated than it needed to be. The point is, you don't have to spend $15 on a diz unless you want to (or maybe someone bought you a nice diz as a gift?). Also, my husband giggles whenever I tell him about spinning/knitting/weaving terminology--"diz" is no exception!

This is a doffer pin. This usually comes with a carder, but you could easily use a long knitting needle if you're in a pinch. (Voice of experience here: don't use a metal knitting needle every time. It'll bend and warp over time, and the tip will become sharper than a nail.)

Most importantly, you need fiber! I'm using hand dyed (by me ^^): Suffolk top, dyed firestar, and dyed tussah silk. Roughly, there are 20 grams of the Suffolk, 1.5 grams of tussah silk, and 0.5 grams firestar.


Apply the fiber to the carder in any fashion you choose. In a future post, I'll hopefully be able to talk about the different ways to apply fiber for different results.

Here is a nice, close-up shot of the fibers on the main drum:


Depending on how blended you want the fibers to be will dictate how many passes you make with the carder. If you start with a dyed, combed top, for example, you may just want to layer the colors on the drum and produce a batt which exhibits color chunks. The spinner can choose to spin the batt however s/he chooses, and s/he might produce a yarn that looks something like this.

In my case, I wanted to make an evenly blended batt, so the color streaks were less defined. I achieved this by sending the carded batt I made through the carder a total of 3 times. In the next 3 photos, I'll show you how I remove a carded batt from a drum carder.

There is a groove where the carding cloth has been stapled to the main drum, which will allow you to remove the fiber from the carder as a batt (a giant rectangle of carded fibers). Insert the doffer pin into this groove, making sure to slide it underneath the fibers.


Once the pin is through, gently lift it at a 45 degree angle from the drum. Continue sliding the doffer pin across this groove and gently lifting the fibers at a 45 degree angle. The fibers over the groove will draft apart, making a clean break from each other. If they don't make a clean break, just work in sections. (If you're confused by this, let me know!)


There are many ways to remove the batt without leaving fibers on the drum carder. To remove the fiber as a batt, I just pinch the fiber between my first and second fingers, and gently pull away from the carder. After I've pulled about 2-3 inches, I scoot my fingers back down to the tines and do it again. Rinse and repeat.


After the batt has been released from the drum, split the batt into 4 or 6 pieces, and recard the batt you just made (if you want it to be more blended, that is). Since my batt was less than 1 ounce, I split it into 4, roughly equal pieces. When you're carding, be sure that you can see through your fiber. Here's what I mean:


When you're ready to remove the batt from the carder for the last time, you can follow the above directions and remove it as a batt, or you can remove it into a roving. I'll show you how I pull the batt into a roving in the following pictures.

Insert the doffer pin into a section of the groove equal to about 1 inch. Lift up, and you'll have a small opening to get started with.


Twist these fibers and push through the opening of your diz. You can also use a small crochet hook to pull the fibers through.


Using a "pull-push" motion, push the diz towards the drum while pulling back on the fiber that has been threaded through the hole in the diz. Do this process while also rotating the drum between the "pull-push" motion, until all of the fiber has been turned into a roving.


After the fiber has been removed, it should look light and airy, and should draft smoothly. If you start with a washed fleece, you can get a very nice preparation for a longdraw method of spinning. If your chosen method of spinning is semi-worsted (like me, at least until I'm better at the long draw), you can still get a loftier worsted spun yarn than if you began with a combed top.

You can wind the roving into a pretty little nest until you're ready to use it.


Carding is time intensive, and can also require more labor if you begin with a washed fleece. Don't expect to produce multiple carded batts per hour, because if you're doing it correctly, you'll probably only manage to get 1 or 2 made in an hour. So, whenever you buy carded batts on Etsy, be sure to thank the seller and offer great feedback. They are a labor of love, much like most products in the fiber world. :)